![[Free template distribution] The first thing I would like to recommend is Notion's note organization method.](http://kurashi-notion.com/cdn/shop/articles/notionblog_memo_9fc76216-fa1b-4bdf-876f-00916015bc9d.jpg?v=1787287849&width=1920)
Hello! I'm Rei, an official Notion ambassador.
When you take notes in Notion, do you ever find yourself thinking, "Where should I put this note?" every time, or struggling to find notes you've already made?
This time, I'd like to introduce a **note list template** to help you **set up an ideal environment for taking notes in Notion!**
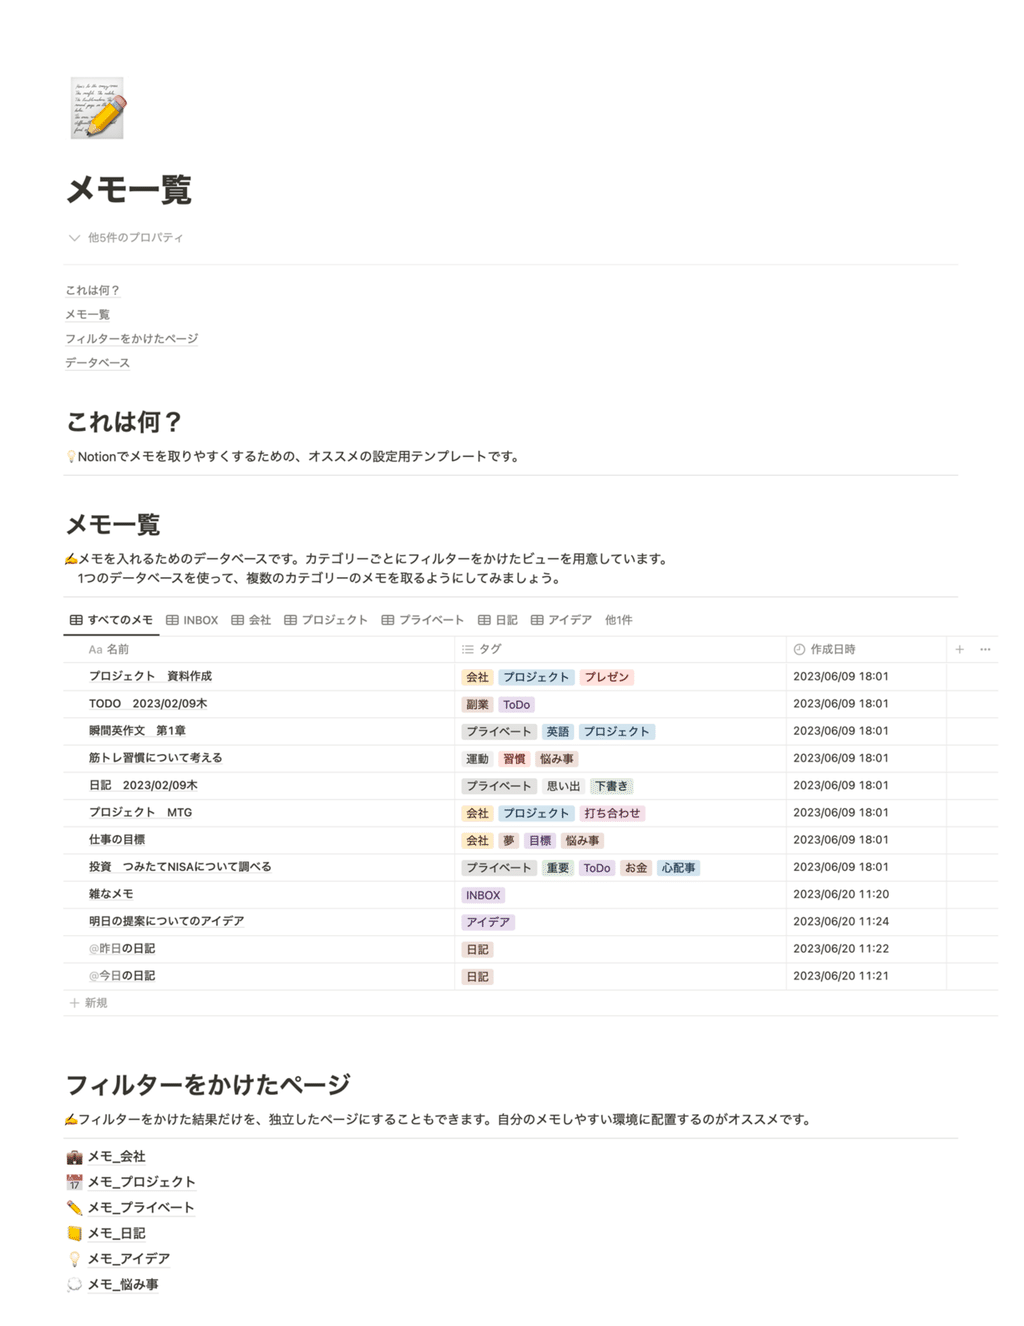
This template is recommended for those who find Notion difficult to use as their pages grow, as well as for those who are just starting to learn how to master Notion.
Also, the content of this article is explained on YouTube. If you prefer to watch a video, please check it out!
What is the correct way to manage notes?
How do you manage your notes in Notion?
Many people probably create pages for each category, such as "cooking" or "work," and take notes within them.
Of course, that is one of Notion's basic uses, and it's a good way to start because it's easy to understand!
However, have you ever found yourself **thinking, "Where should I put this note?" every time before taking a note, or struggling to find notes you've already made?**
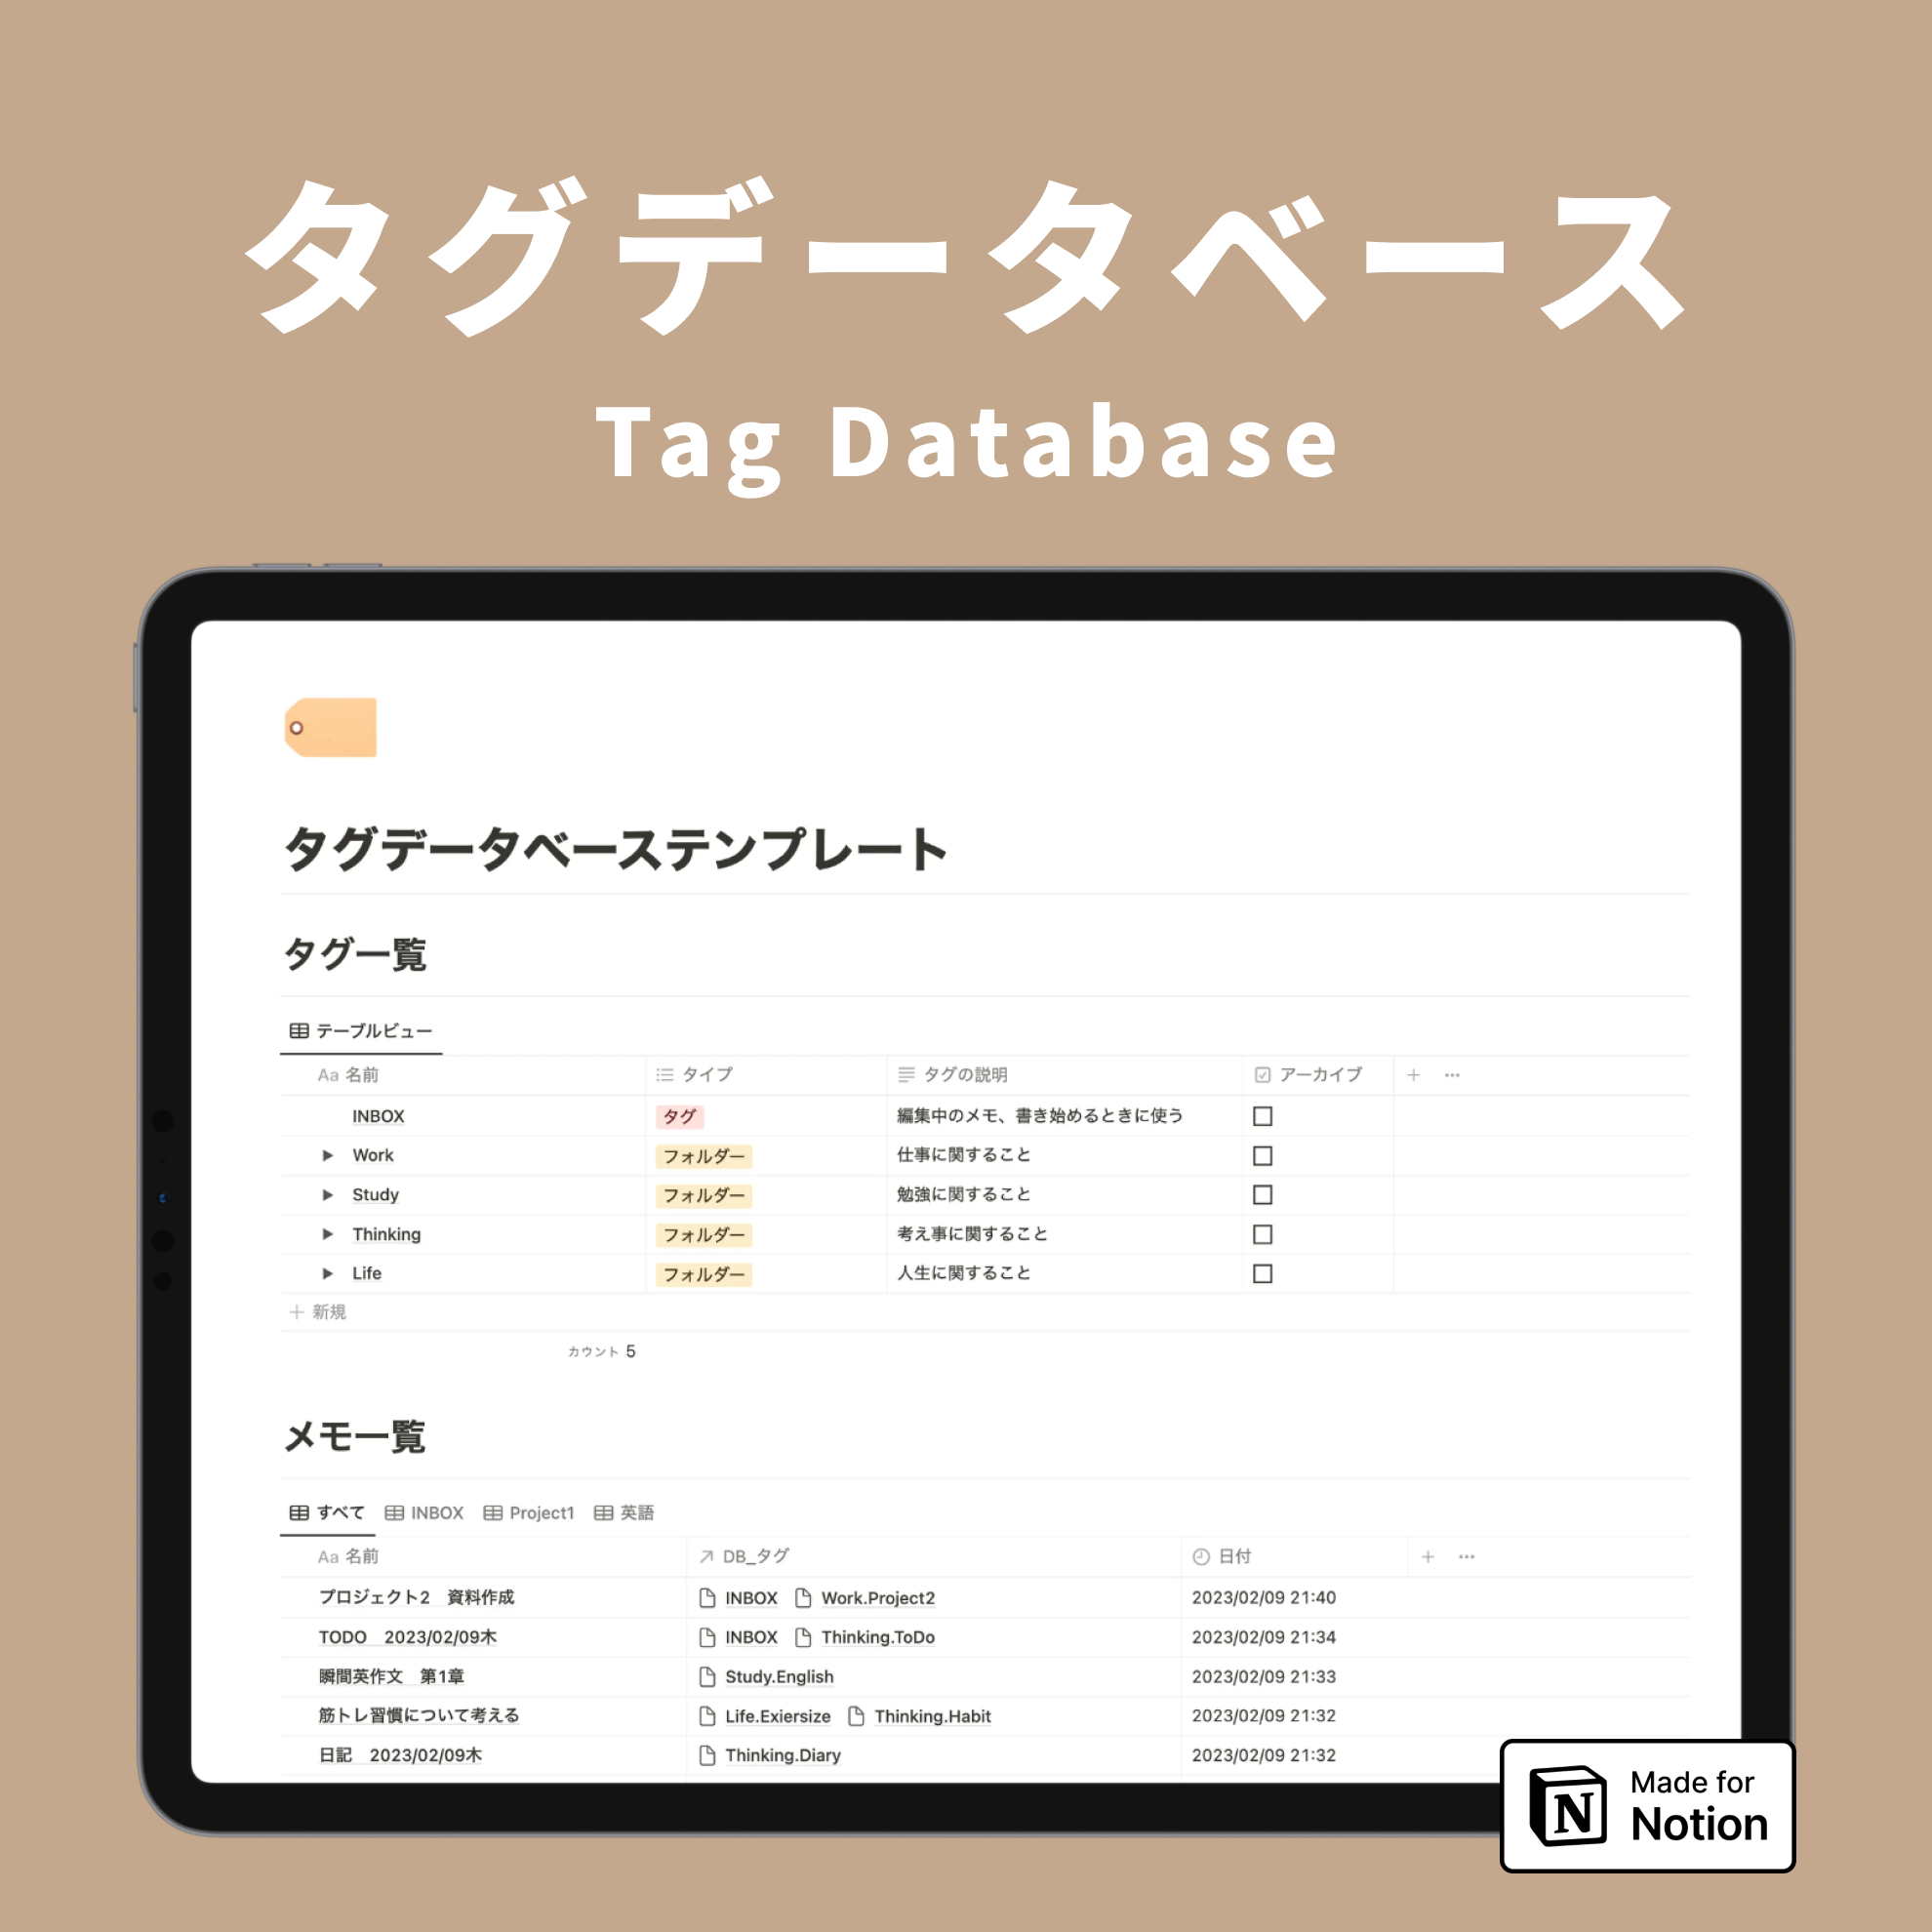
Actually, the recommended way to take notes in Notion, like in this template, is to "**concentrate your notes in one place**" and "**organize them with tags**."
This time, I'll introduce a **note list template** to help you set up an environment for taking notes!
Take this opportunity to get your Notion organized with me!
Recommended way to manage notes in Notion.
Now, let's go over the details and how to use the template we're providing.
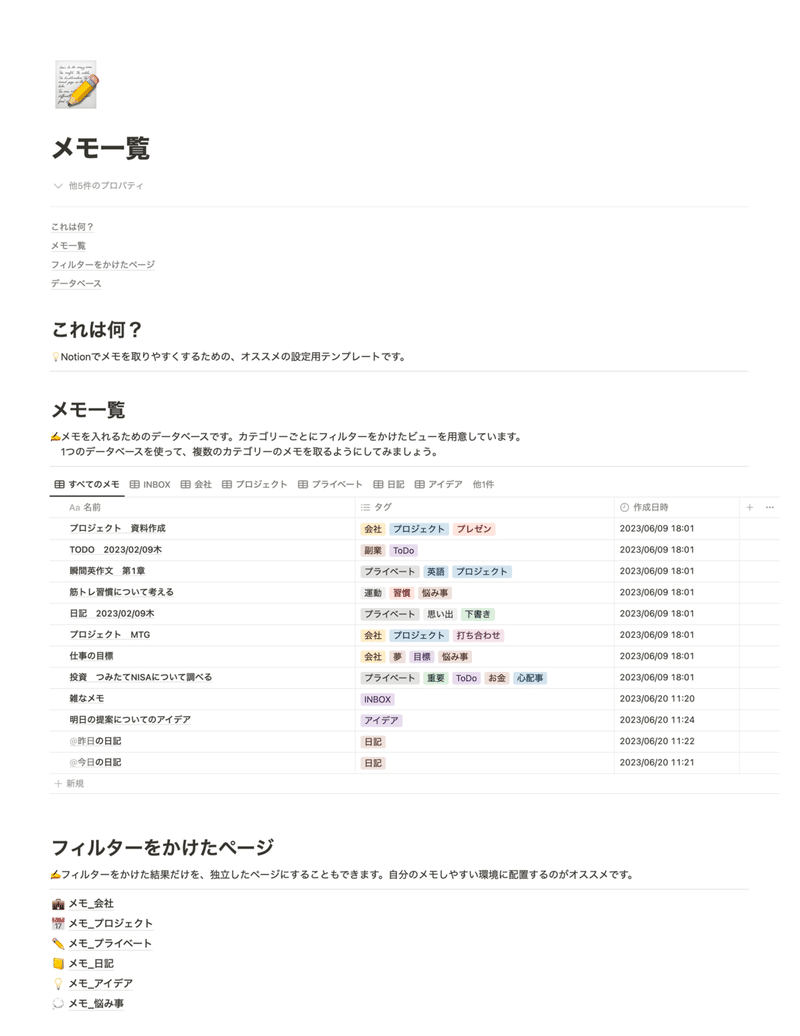
1. Keep hierarchies and databases as simple as possible.
Notion allows for deep hierarchies, so it's easy to end up creating notes deep within various pages.
However, by **consolidating notes in one place and simplifying hierarchies and databases**, you can save the effort of thinking "where should I put this note?" every time before taking a note, and it becomes easier to find existing notes.
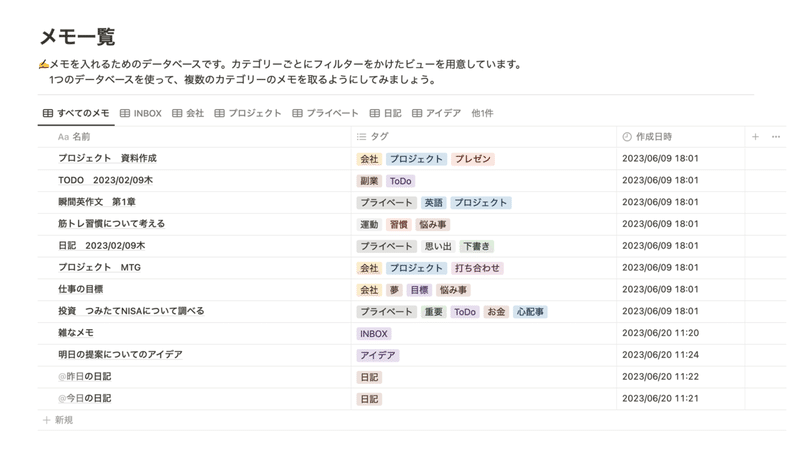
It might be a bit of work for those who have stored notes on various pages, but please take this opportunity to consolidate your notes in one place!
2. Let's create a note
Let's duplicate the template and try it out!
First, we'll create a new page using the "+ New" button in the "Note List" database.
The content of the note can be anything you usually write. Enter a title and write what you want to note down on the page.
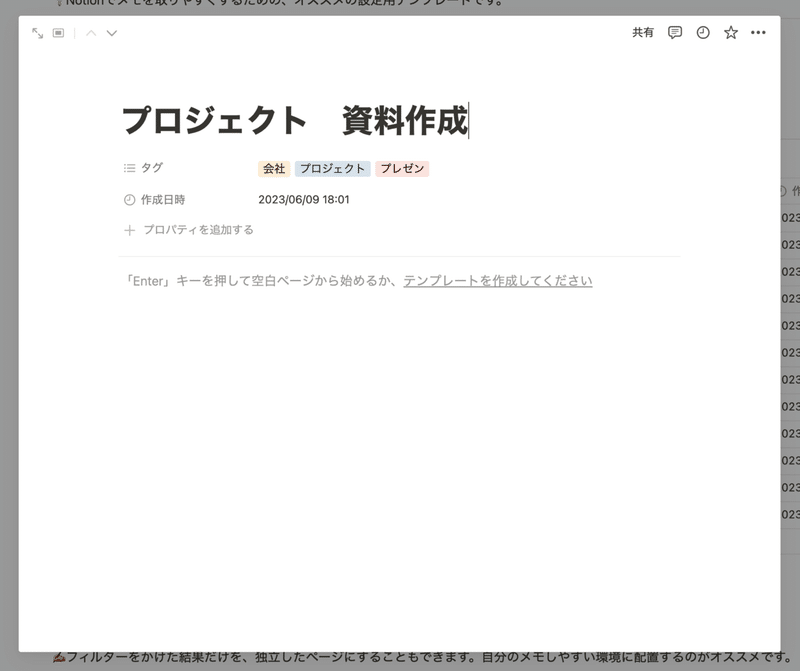
Next, select the **note genre using the "Tag" property**.
I've prepared genres such as "INBOX" for miscellaneous notes, "Inspiration" for saving good ideas, and "Ideas" for work or personal projects.
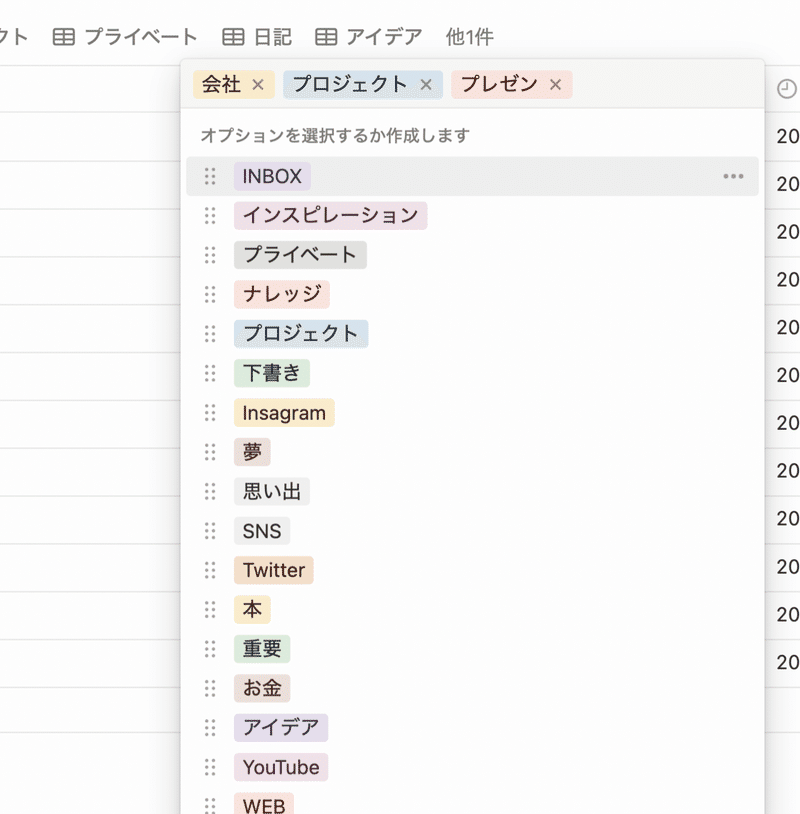
Of course, the genres in the template are just examples, so feel free to customize them to your liking!
3. When searching for notes, use filters.
When you want to find a note you've created later, it's convenient to filter by the tag you set earlier. For example, you can display only notes related to "work" or only "diary" entries.
Furthermore, the tabs at the top of the "Note List" database allow you to **freely create views filtered by your favorite tags**. If you create tabs for frequently used genres in advance, you can easily access them.
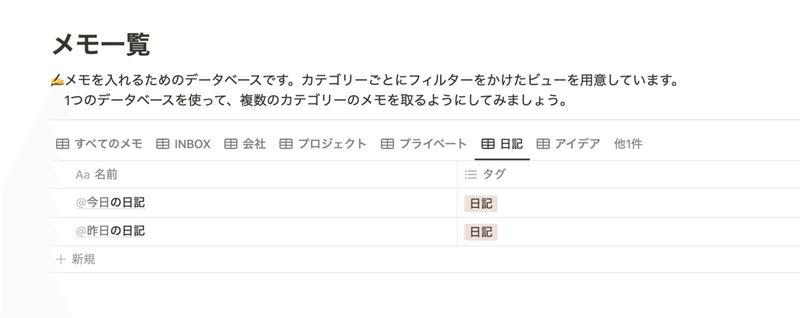
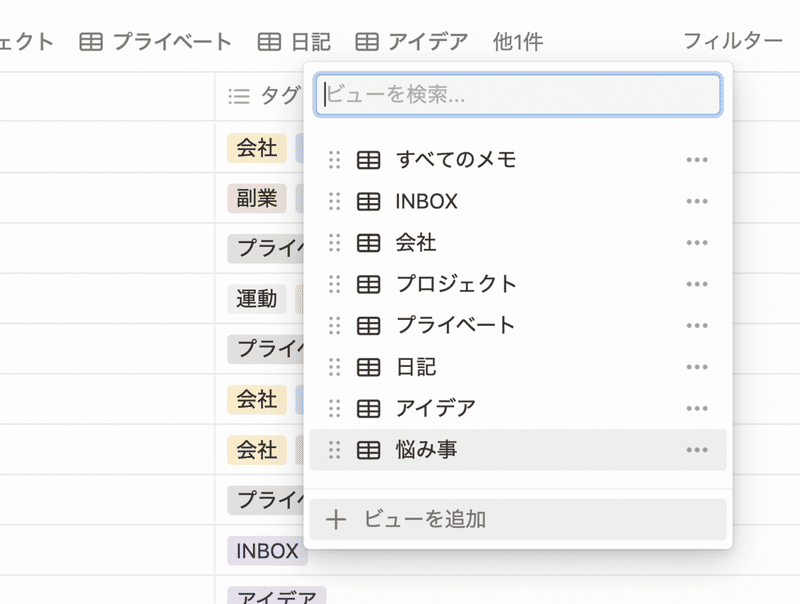
Setting up views is very easy, so please give it a try!
First, click the "+" button to the right of the tabs at the top of the database and select "Add a view."
Next, from the "Filter" in the top right, select the "Tag" you want to filter by.
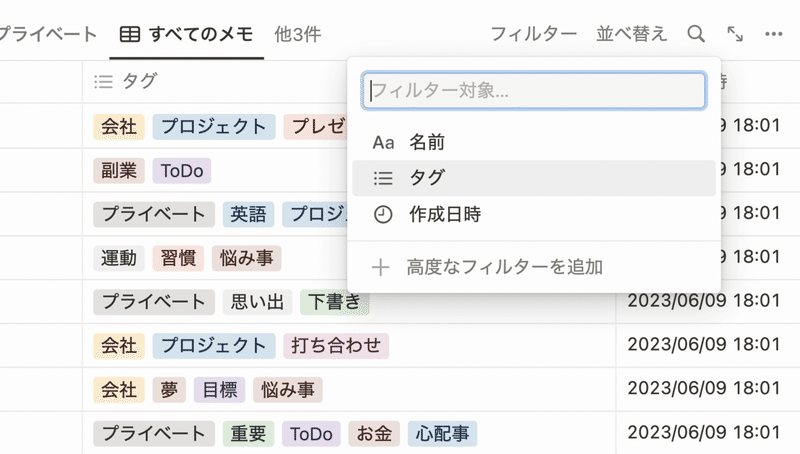
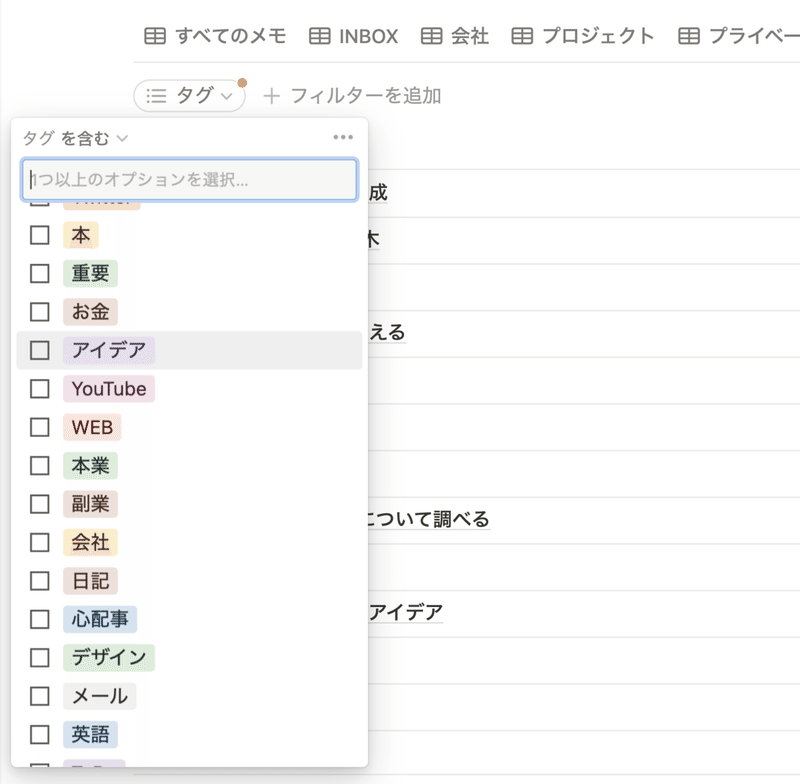
With this, a view displaying only notes with the corresponding tag is complete. Please try creating various views and use them conveniently!
💡If you have a lot of tags, it's convenient to convert them into a database!
In this case, we are separating category tags using the "Select" property, but if you convert these category tags into a database and utilize the "Relation" feature, it will be easier to organize even if the number of tags increases.
For example, you can easily reorder tags, or group them into larger categories like "Work" or "Personal."
We have explained how to create these notes in detail in a previous article, so please check it out as well.
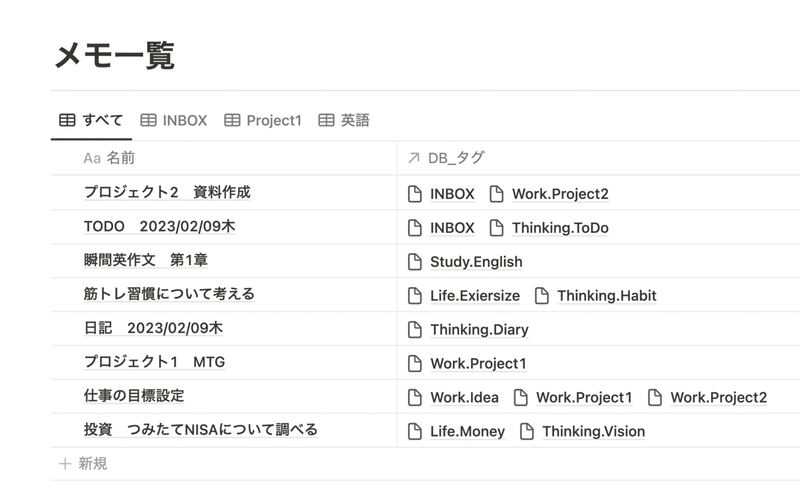
🔗 Explanation article and template available here!
👇 We also explain it in the video!
4. Convert favorite views to pages
Finally, to use notes even more conveniently, let's turn your favorite views into a single page!
In Notion, you can actually **turn a filtered view into an independent page**.
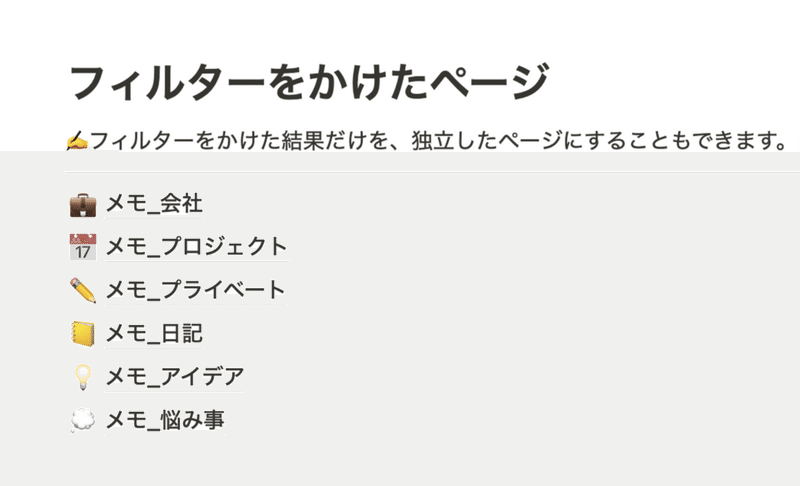
Converting to a page allows it to be **displayed in the "Sidebar" on the left** and enables you to **place links on other pages**, making it even easier to access your notes.
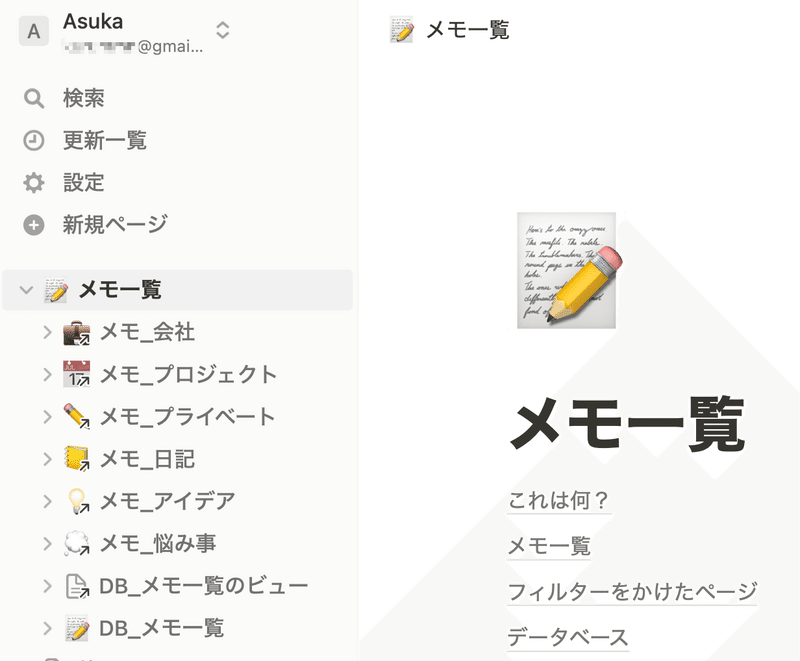
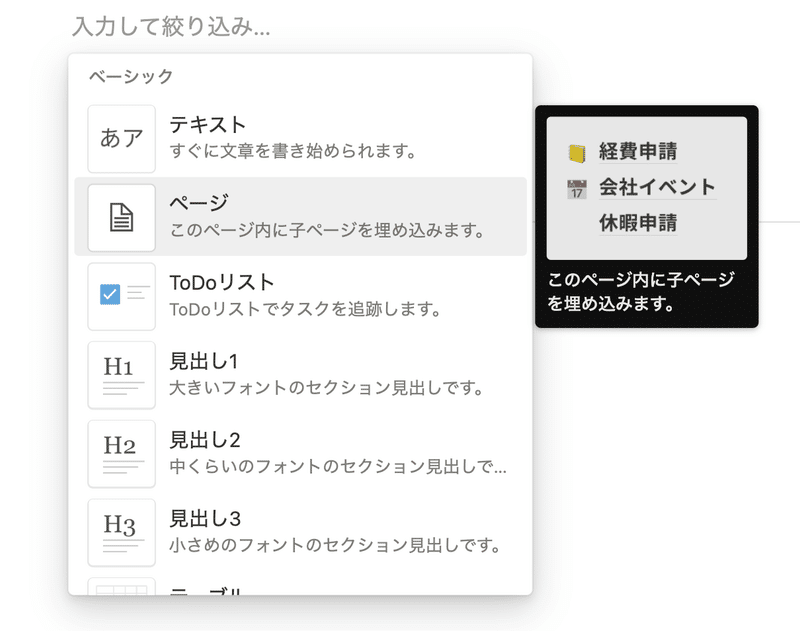
To create a page, hover your cursor over the blank space, click the "+" button, and select "Page" to create a new page. Once the new page opens, select the "Table View" format.
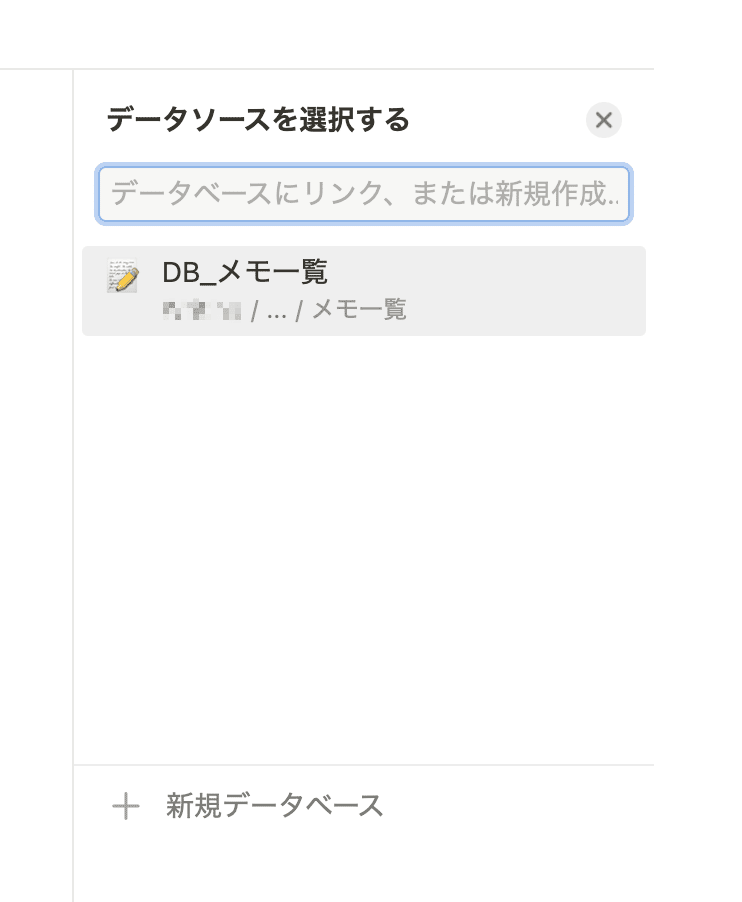
For the data source, select "DB_メモ一覧" (the database where you put notes).
Then, just apply a filter to the tags you want to turn into a page, such as "Ideas," and you'll have a page dedicated to that specific category!
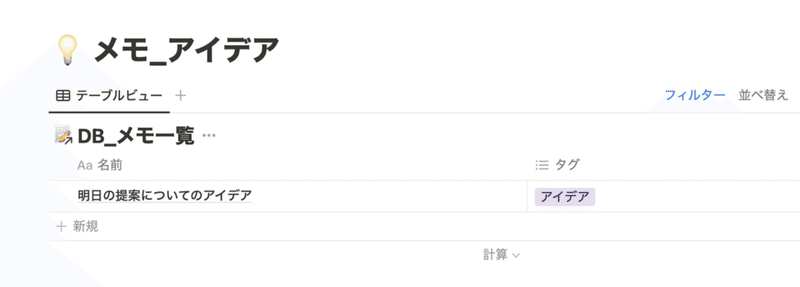
Please use page conversion for frequently used notes!
Summary
That concludes our introduction to the **recommended method for managing notes in Notion**! How was it?
【Template Distribution】
Finally, we are **distributing the Notion template for the note list** introduced this time for free. Please feel free to use it!
💡"Note List" templatehttps://kurashi.notion.site/56911ffa7c4e49b2b46662da82cf99e7?pvs=4
*This is a public URL, so please handle it with care. You may duplicate and modify it, but selling or redistributing it is prohibited.
Here's "Todotion," the ultimate task management template in Notion!

The complete 2-hour "Notion Master Course" is now available, where you can learn Notion from scratch through videos!

The book "Notion Life Hacks," which introduces 36 ways to use Notion, is also on sale!