💡The " Notion Life Community " is now open!
By subscribing, you can read all paid articles , and you also get benefits such as Notion support for questions and study sessions . Click here to join the community where you can connect with many Notion users!
A "portfolio" is often required when changing jobs or accepting work individually.
Many people want to create a cool website, but feel that creating it on their own is a bit of a challenge.
We recommend Notion for creating such a portfolio. Notion allows you to publish the pages you create like a website with just one click, making it ideal for creating simple sites like portfolios.
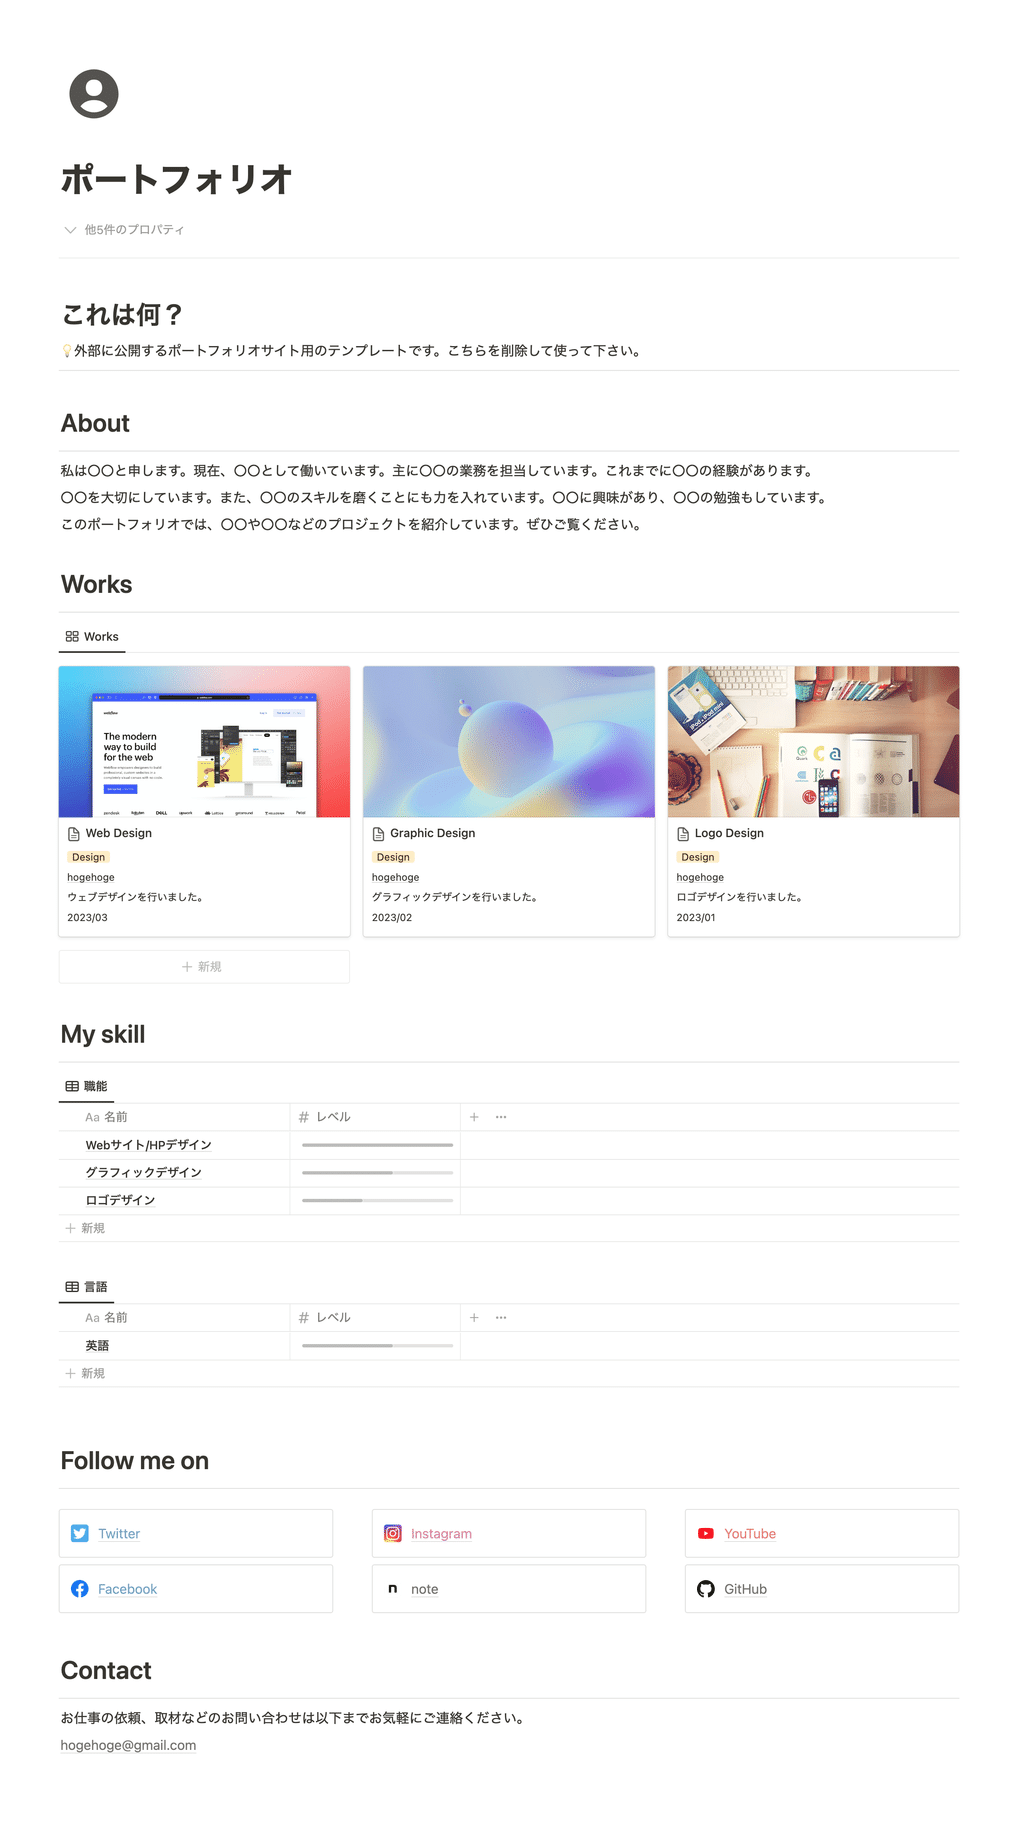
This time, we'll show you how to create a portfolio website like this using Notion!
🎬 Director: Rei
✍🏻 Writer: Mino Kurumi
1. How to create a portfolio
Let's take a look at how to create a portfolio using a template.
1-1. Write a self-introduction
First, write a self-introduction in the "About" section.
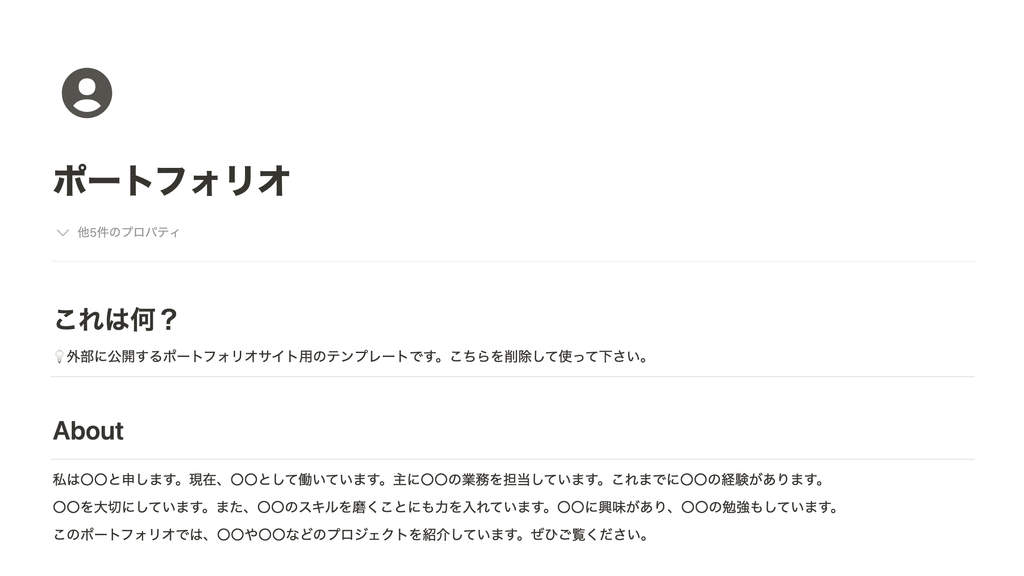
Write a brief summary of your current job and the jobs you have had up until now.
It is also recommended to highlight not only your work but also your personal activities and studies.
1-2.Introduce past cases
Next, list your past achievements in the "Works" section.
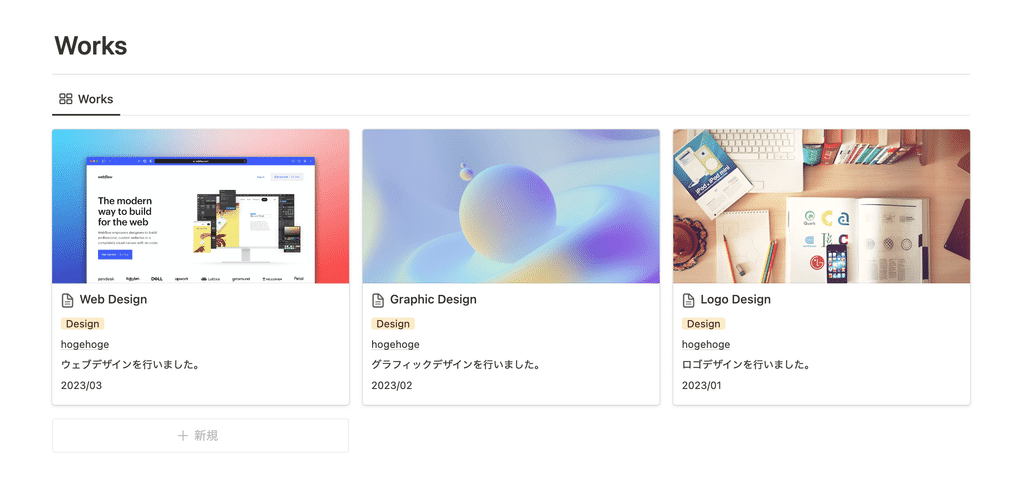
Create a new page using the "+ New" button and enter a title. If you work across several genres, we recommend selecting the type of work you do using "Tags" to make it easier to understand.
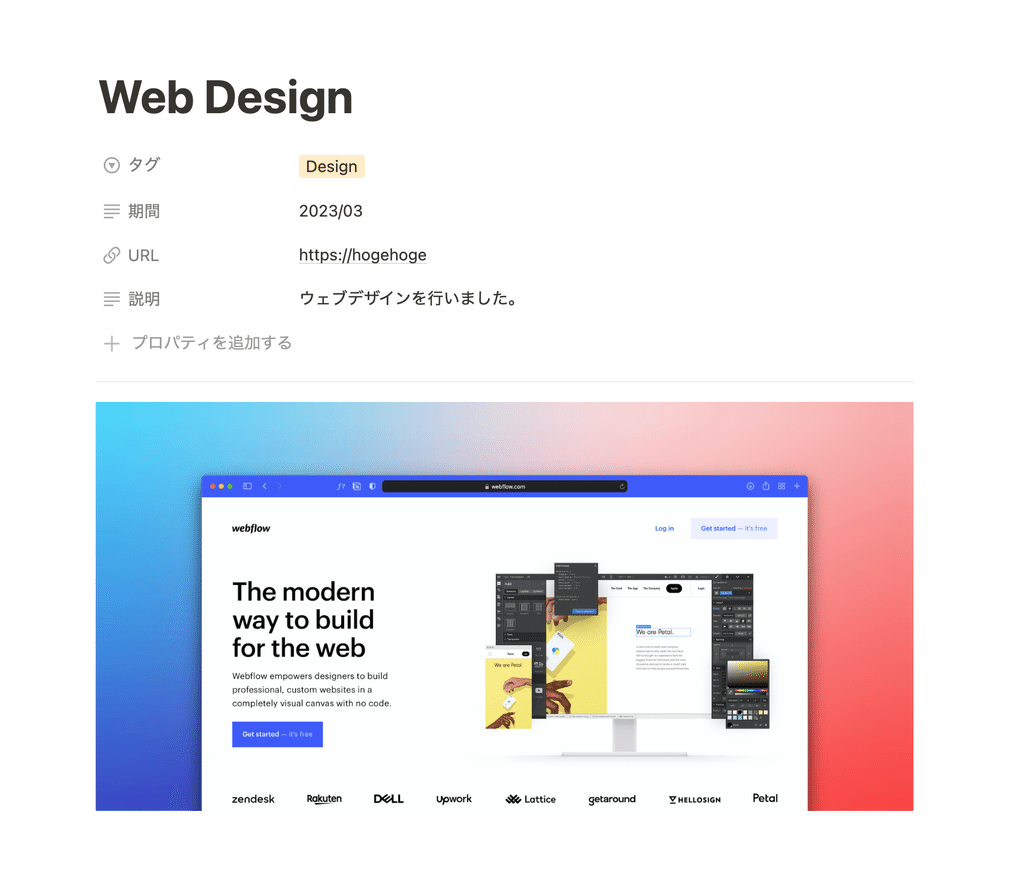
I also added a field for entering a URL, a summary, and a date. You can also open each page individually, so it would be nice to add an image of the project or detailed information to each page.
Just listing all the work you've been involved in like this makes it look like a pretty impressive portfolio!
1-3. Expressing skills in a graph
In "My skill" we have prepared a table that allows you to graph your skills.
Create a new page and open it to enter the "Level." Enter a number on a 5-level scale and it will automatically be displayed as a bar.
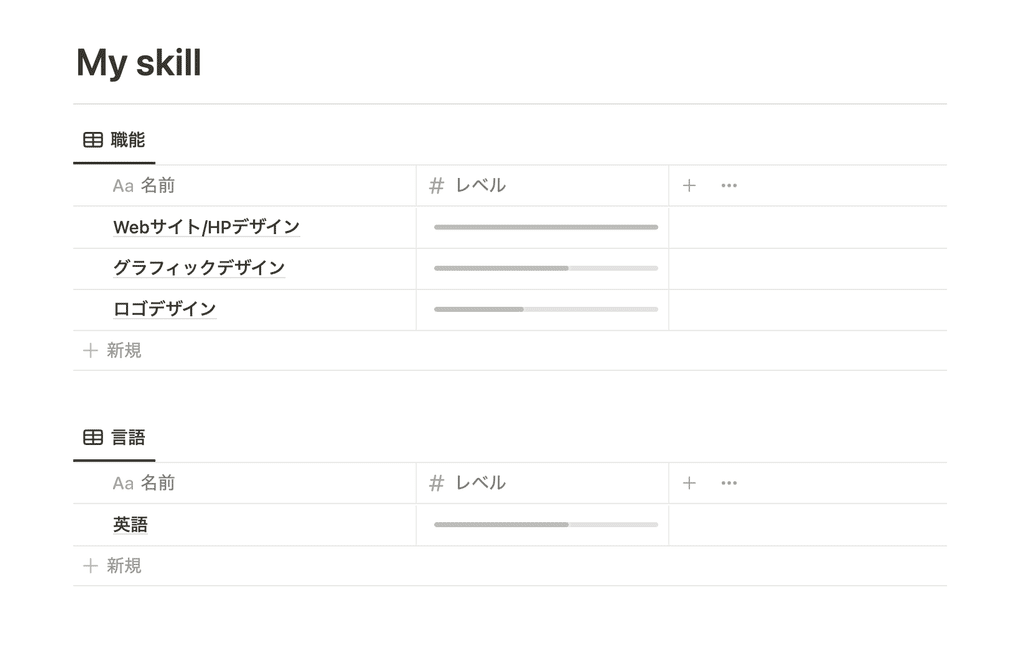
It's a skill that's difficult to highlight, but by listing it like this, it becomes easier to see what you can do and how well you can do it.
The template creates tags for "occupation" and "language" and displays them separately, but it seems possible to create other tags such as "qualifications" and "licenses."
If you want to add more types of tables, just copy and paste the table and re-filter it with your preferred tags.
1-4. Set up social media links
Next, add links to various social media sites.
In the "Follow me on" section, we have provided link buttons for major social media platforms. You can delete any social media platforms you don't use.

Select the text you want to link and select "Link" from the menu bar. You will then be able to enter the URL and title of the link, so paste your SNS profile URL into the "URL" field.
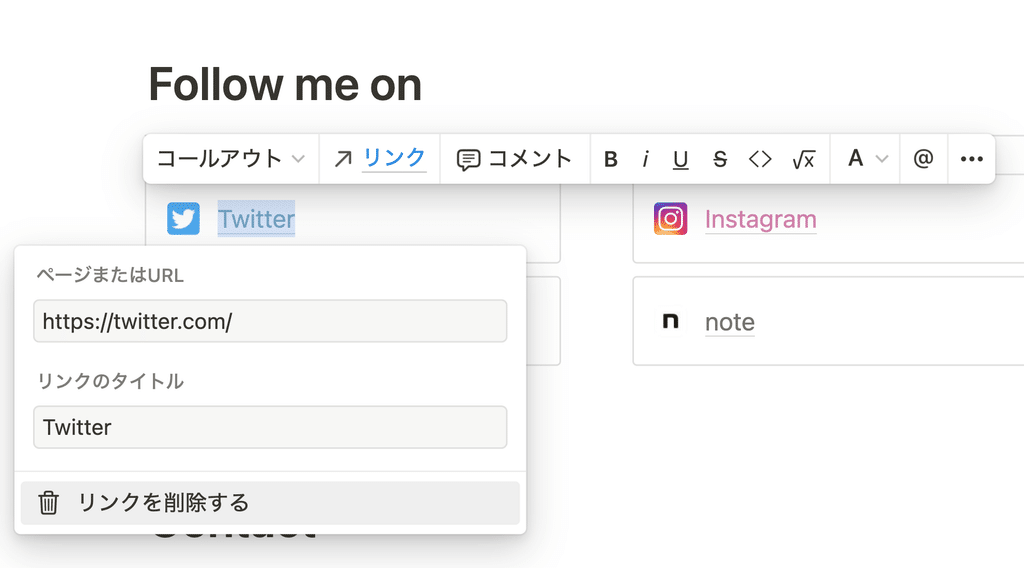
Now you have a link button that will take you to your social media page when you click on the text.
💡 COLUMN: Use callouts to create stylish link buttons.
This SNS link uses the "callout" function, which surrounds the text with an icon at the beginning. You can easily change the link to other SNS by changing the text color and icon.
If you want to change the icon, click on the icon and choose from existing emojis, or you can choose your favorite image by clicking "Upload."
1-5. Include your email address
Finally, paste your contact information and your portfolio is complete.
Here, let's set it up so that clicking on an email address will open an email screen addressed to that address.

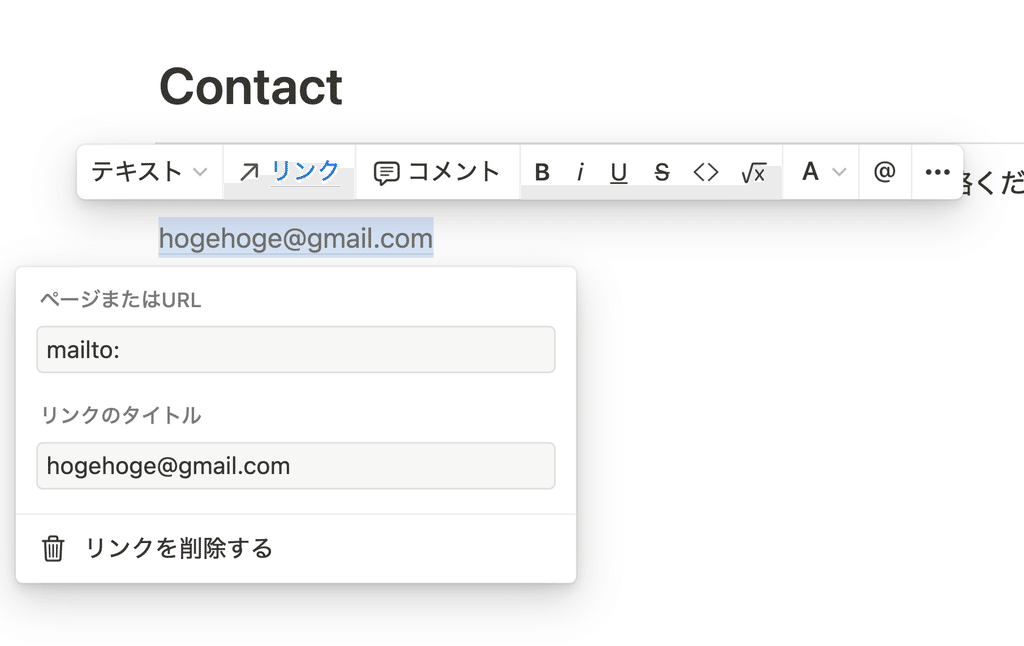
First, enter your email address as text, then select the text just like you did with the social media link above and click "Link."
If you enter an email address in the URL section, prefixed with "mailto:", the email address will become clickable and a screen for creating an email to yourself will automatically open.
2. Publish your portfolio
Once your portfolio is complete, publish it on the web and issue a URL!
Publishing is very easy. Just click the "Share" button on the top right of the page, open the "Web Publishing" tab, and press the "Publish" button to publish a web link.
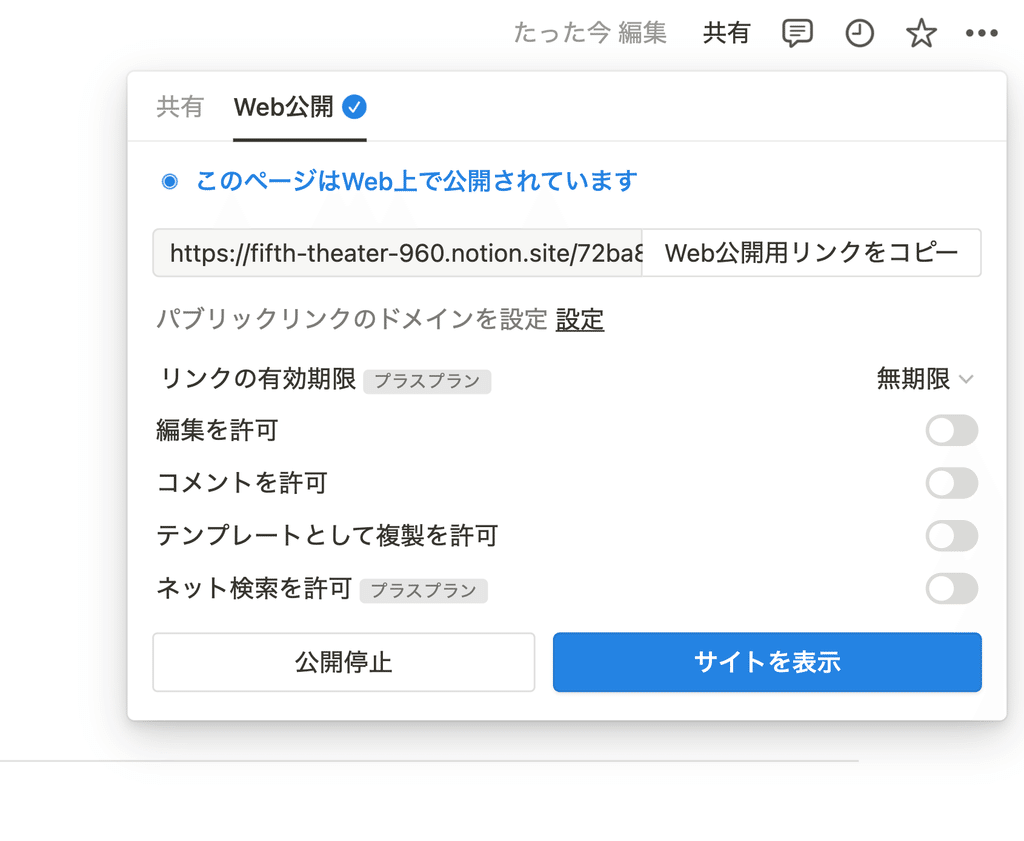
You can set detailed permissions such as editing and copying, but since we want to use it as a web page this time, we will turn them all off.
Of course, you can post the URL you obtained on social media or send it in an email.
Even if you edit the contents of your portfolio, the URL will not change, so it seems like updates will be easy.
summary
That's it for our introduction to portfolio templates! We encourage you to try creating your own portfolio with Notion.
Click here for a list of Notion templates available on "Notion in Life" !
The book "Notion Life Hacks" is now on sale! It includes 36 templates and provides plenty of practical tips on how to use Notion.
We also introduce how to use Notion and specific examples of its use on YouTube , so please take a look if you're interested.
We will continue to provide information about daily life and Notion to help you get the most out of your busy days.
Thank you for reading to the end!
See you in the next article.

![[Template included] How to easily create a portfolio using Notion.](http://kurashi-notion.com/cdn/shop/articles/notionblog_Portfolio_cbd72c34-0322-4f38-9b3e-13b97a5a7ac8.jpg?v=1739847766&width=1920)


![[Announcement] We're holding our first offline event for Life and Notion! 🎉](http://kurashi-notion.com/cdn/shop/articles/OfflineEvent_Campusflat_26cbedc1-8828-4a65-bf7d-b91d1691b22e.jpg?v=1745149822&width=1920)
