💡The " Notion Life Community " is now open!
By subscribing, you can read all paid articles , and you also get benefits such as Notion support for questions and study sessions . Click here to join the community where you can connect with many Notion users!
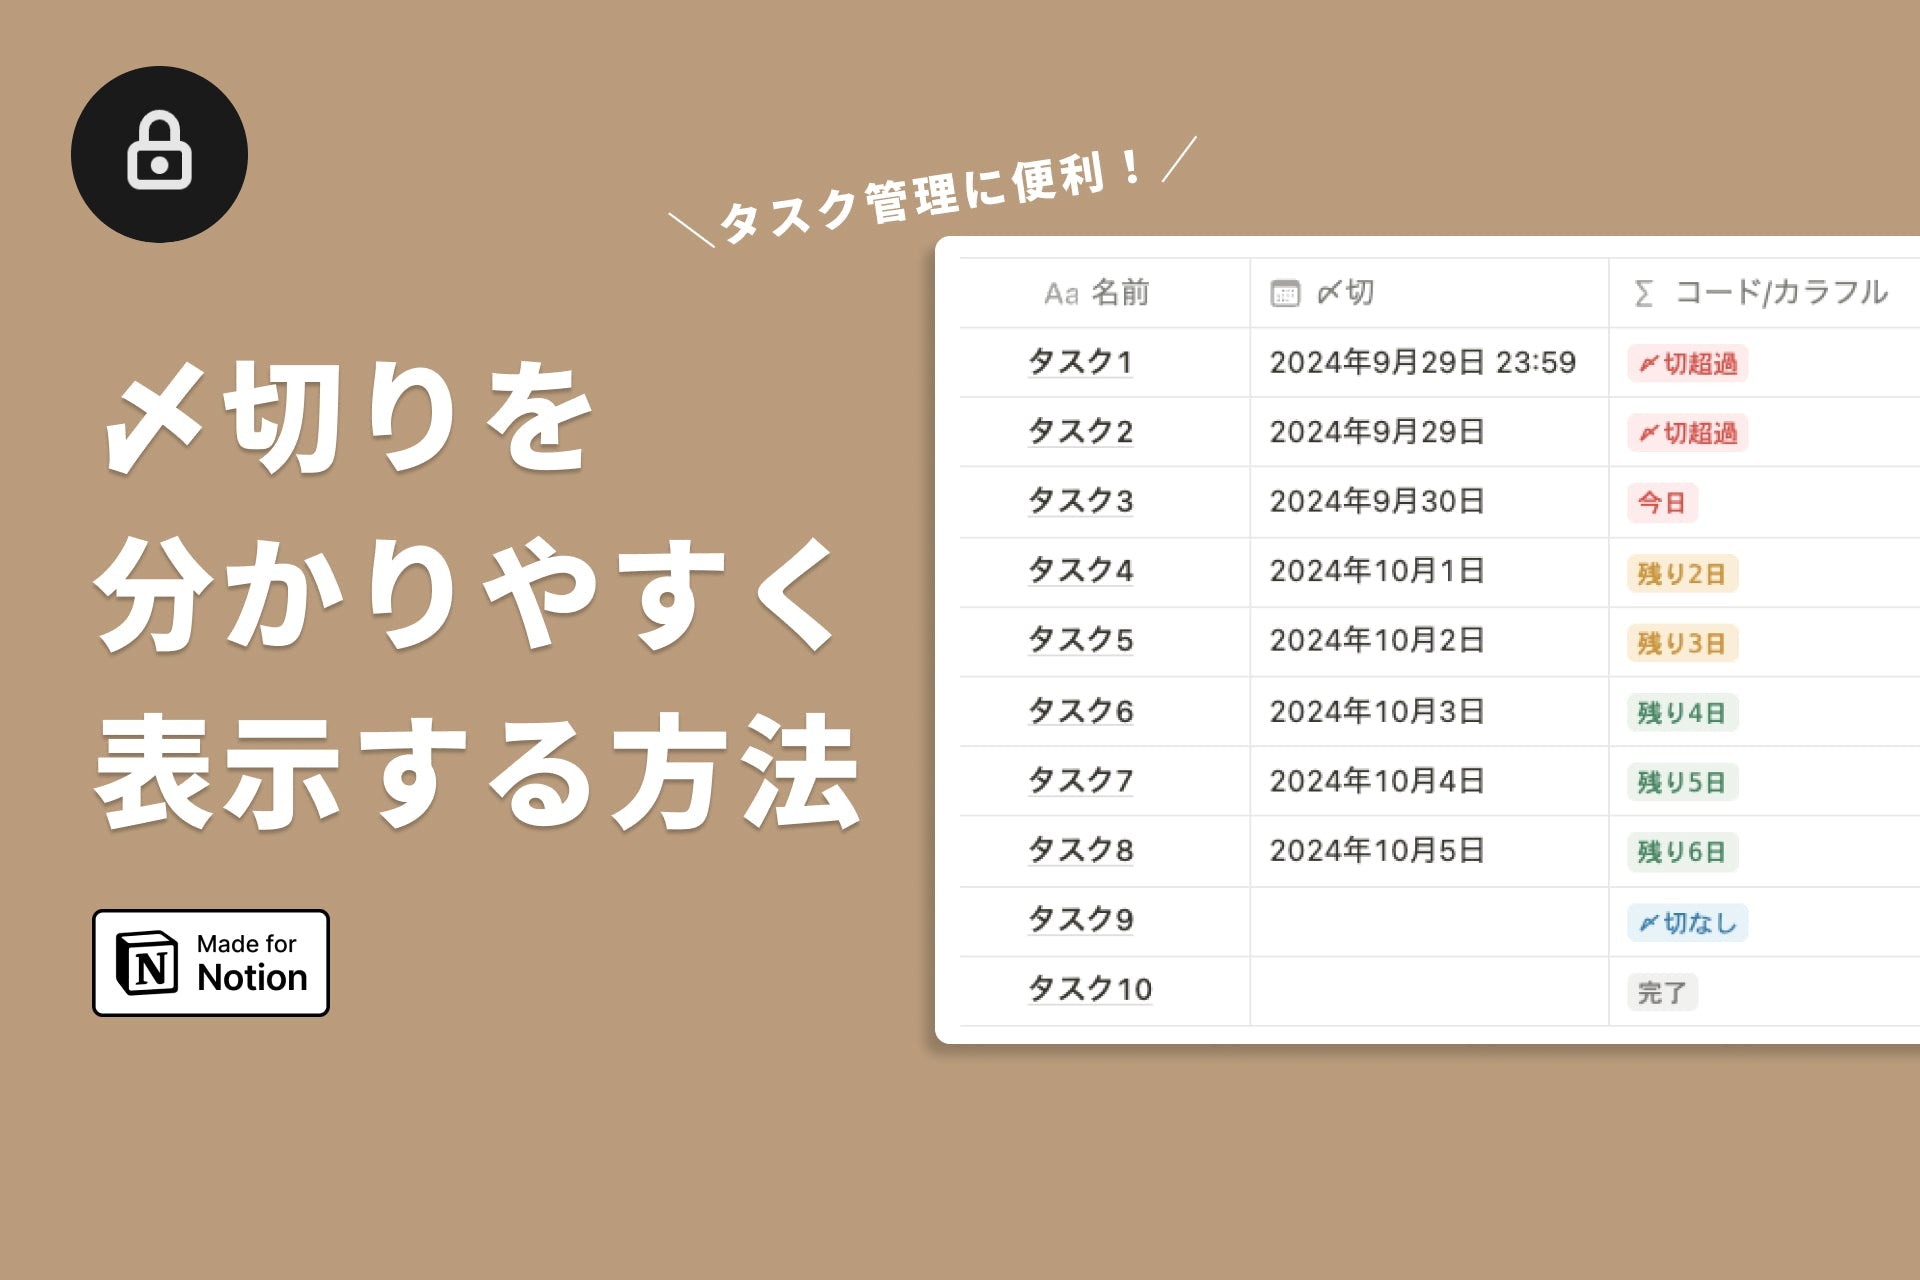
When managing tasks with Notion, you might sometimes feel that it would be convenient if the deadline was displayed as "X days left until the deadline."
This time, I tried to display such a deadline using a formula (function)!
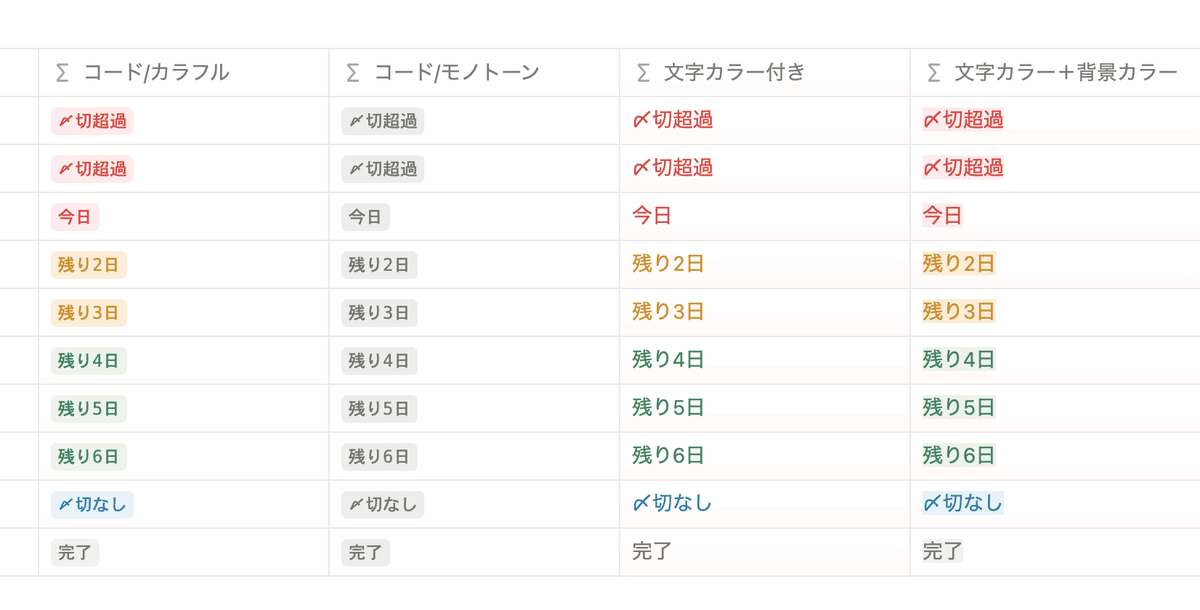
In this article, we will introduce formula code that you can use just by copying and pasting, as well as how to customize it.
The explanations are easy to understand even for those who are not good at formulas or who have not yet mastered Notion, so please read to the end!
🎬 Director: Rei
✍🏻 Writer: Mino Kurumi
1. Preparation: Prepare a database
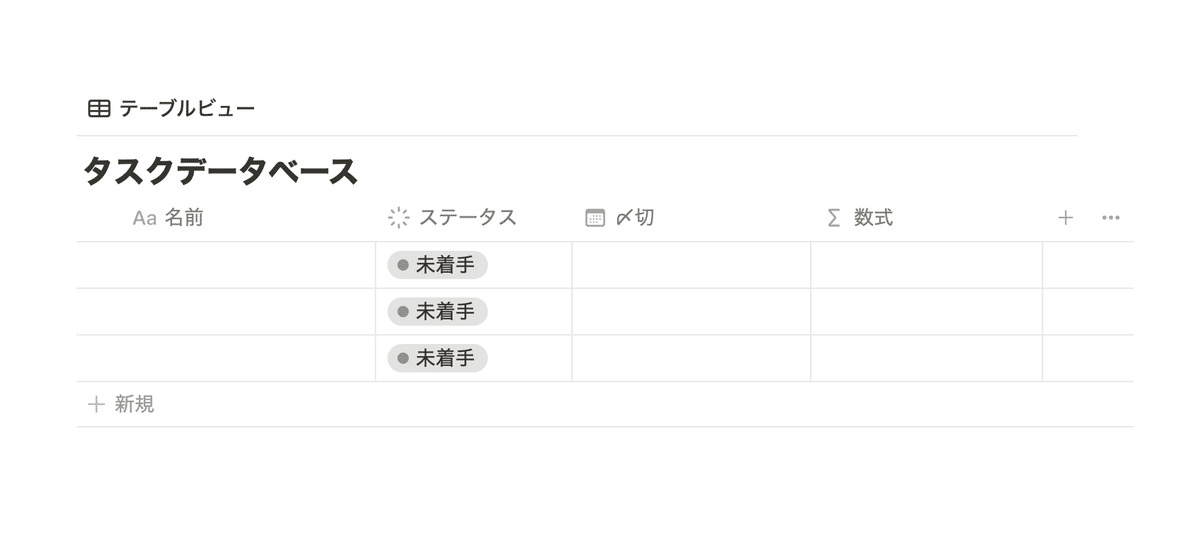
First, prepare a task database to which you want to add formulas, and set the following properties.
If you are already using Notion for task management, you can use it as is if it has the properties introduced below.
You can use the same name as the example, or you can use your own name.
-
Status Property
-
Date property (for deadlines)
-
Formula Properties
🔗If you don't know how to create a database, click here !
The status can also be displayed as a checkbox, so you can choose the format you like.
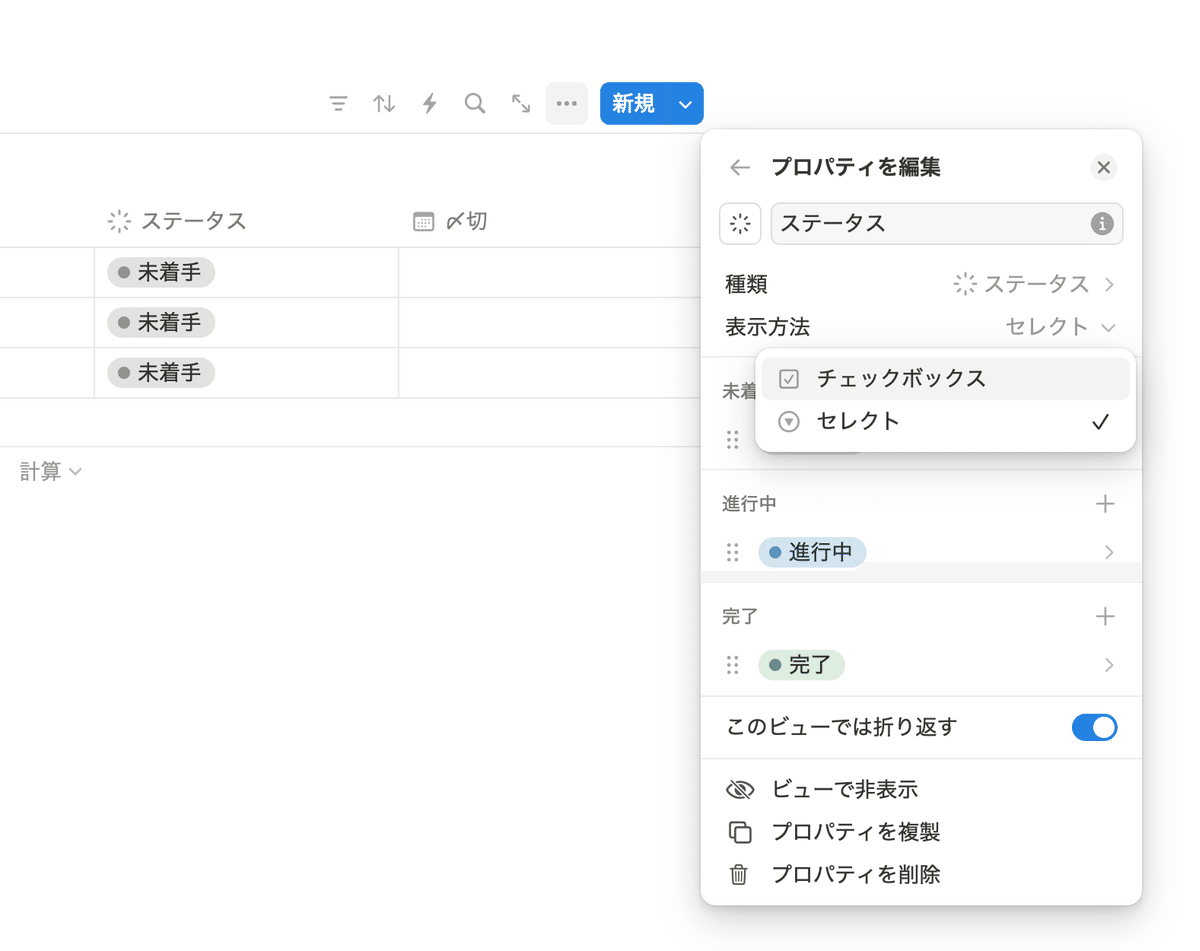
🔧 How to change the status display method <br>You can select whether to display the status as a checkbox or select by going to Edit Properties → Display Method.
2. Formulas to be distributed this time (code distribution)
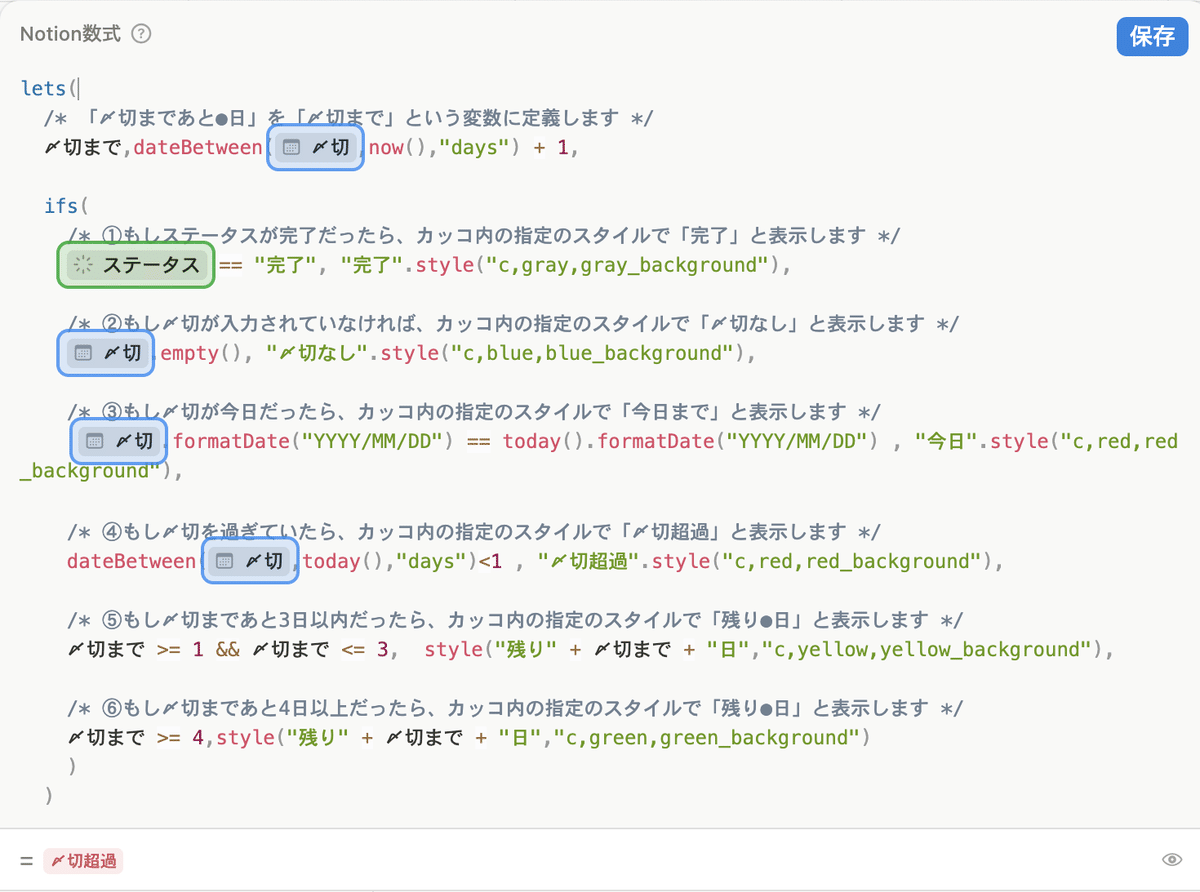
Once you're ready, let's add the formula. The overall formula we're using looks like this:
 lets(
 /* 「〆切まであと●日」を「〆切まで」という変数に定義します */
 〆切まで,dateBetween(prop( "〆切" ),now(), "days" ) + 1 ,

 ifs(
/* ①If the status is completed, display "Completed" in the style specified in the brackets */
 prop( "status" ) == "completed" , "completed" .style( "c,gray,gray_background" ),

 /* ②If no deadline is entered, it will display "No deadline" in the style specified in the brackets */
 prop( "Deadline" ). empty (), "No Deadline" .style( "c,blue,blue_background" ),

 /* ③If the deadline is today, it will display "Until today" in the style specified in the brackets */
prop( "Deadline" ).formatDate( "YYYY/MM/DD" ) == today().formatDate( "YYYY/MM/DD" ) , "Today" .style( "c,red,red_background" ),

 /* ④If the deadline has passed, it will display "Deadline Passed" in the style specified in the brackets */
 dateBetween(prop( "Deadline" ),today(), "days" )< 1 , "Deadline exceeded" .style( "c,red,red_background" ),

 /* ⑤If there are less than 3 days left until the deadline, it will display "● days remaining" in the style specified in the brackets */
Deadline >= 1 && Deadline <= 3 , style( "Remaining" + Deadline + "days" , "c,yellow,yellow_background" ),

 /* ⑥If there are more than 4 days left until the deadline, it will display "● days remaining" in the style specified in parentheses */
 Deadline >= 4 ,style( "Remaining" + Deadline + "days" , "c,green,green_background" )
 )
 )
3. How to customize (code distribution included)
This formula is perfectly usable as is, but for those who want to further customize its appearance, we will introduce some customization methods and design ideas.
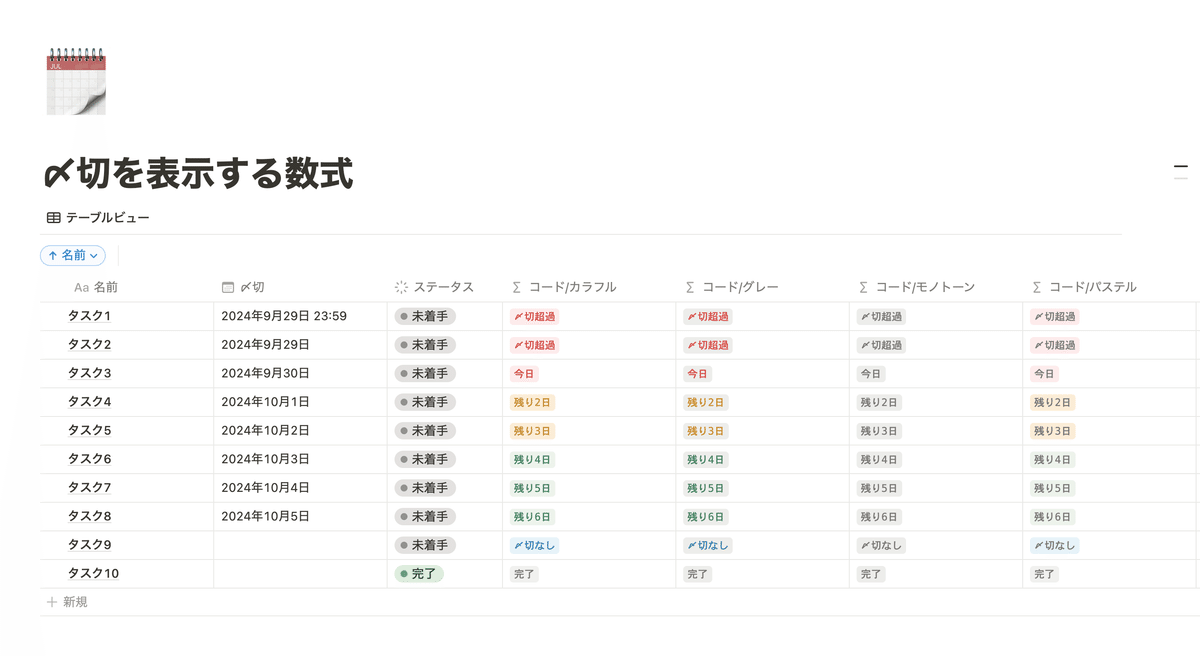
We will provide code for all of the design ideas we introduce at the end, so if you would like to use them as is, please feel free to use them!
Customization ①: Change the text content
If you want to change the text to be displayed, change the text just before the ".style" function. The text has "" symbols before and after it, but do not delete these, just change the contents.
For example, if you want to change "Completed" to "Completed," change the code in ① as follows:
/* ①If the status is completed, display "Completed" in the style specified in the brackets */
prop("status") == "completed", " completed ".style("c,gray,gray_background"),
⑤ and ⑥ are written differently from the others, but the characters for "remaining" and "day" can be changed in the same way. If you want to completely delete either one, delete the "+" before and after it as well.
/* ⑥If there are more than 4 days left until the deadline, it will display "● days remaining" in the style specified in parentheses */
Deadline >= 4,style(" Remaining " + Deadline + " Days ","c,green,green_background")
Customization ②: Change the text style
In the example below, we are using the "Code" text style, which has a rounded background underneath the text, but you can change this text style as well.
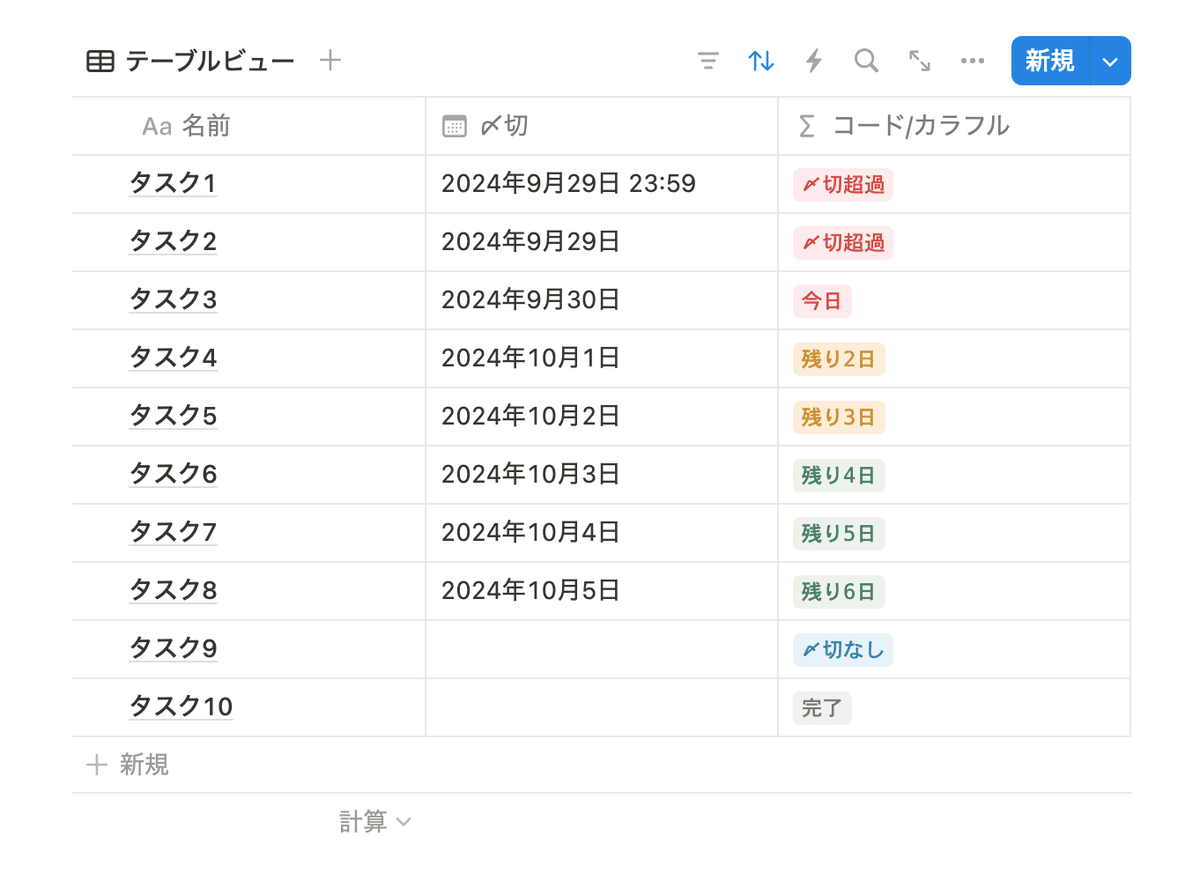
This is specified by the contents of the brackets within each ".style" in ① to ⑤. In the example, the first code in the brackets is "c", so simply replace this with the code for the style you want to change:
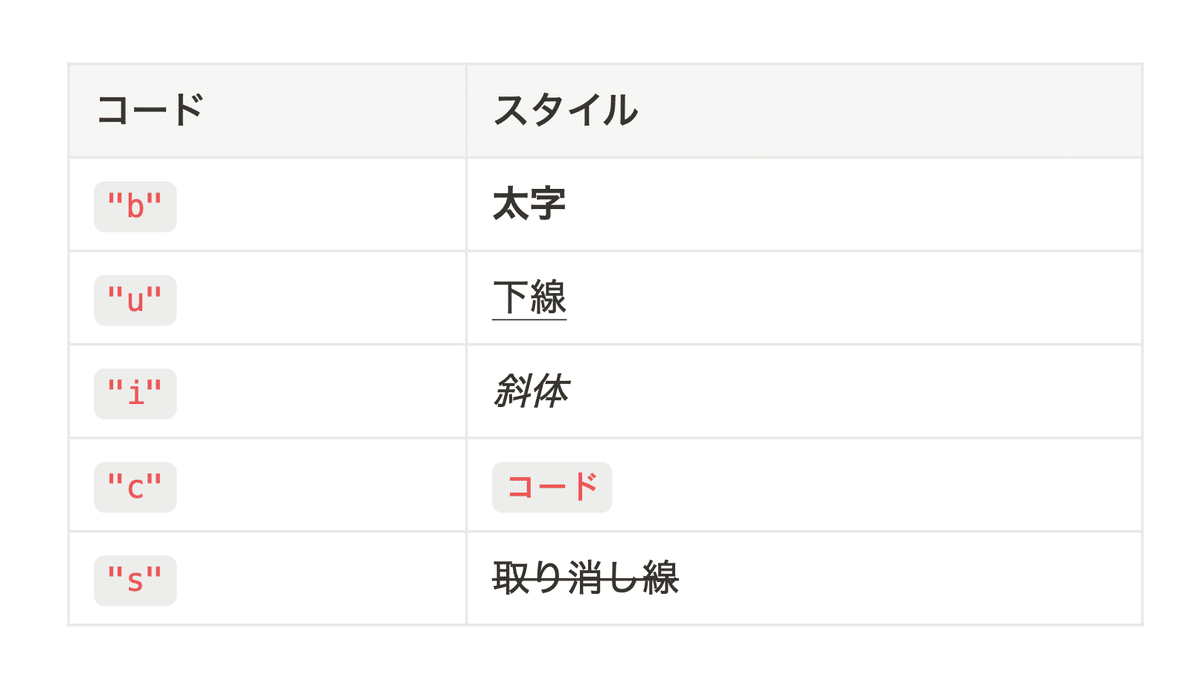
/* ①If the status is completed, display "Completed" in the style specified in the brackets */
prop("status") == "completed", "completed".style(" c ,gray,gray_background"),
By the way, if you delete the "c", it will return to the normal style. In this case, please also delete the comma immediately following it.
Customization 3: Change the text color
Just like the text style, you can also customize the text color and background color. The colors that can be changed are as follows:
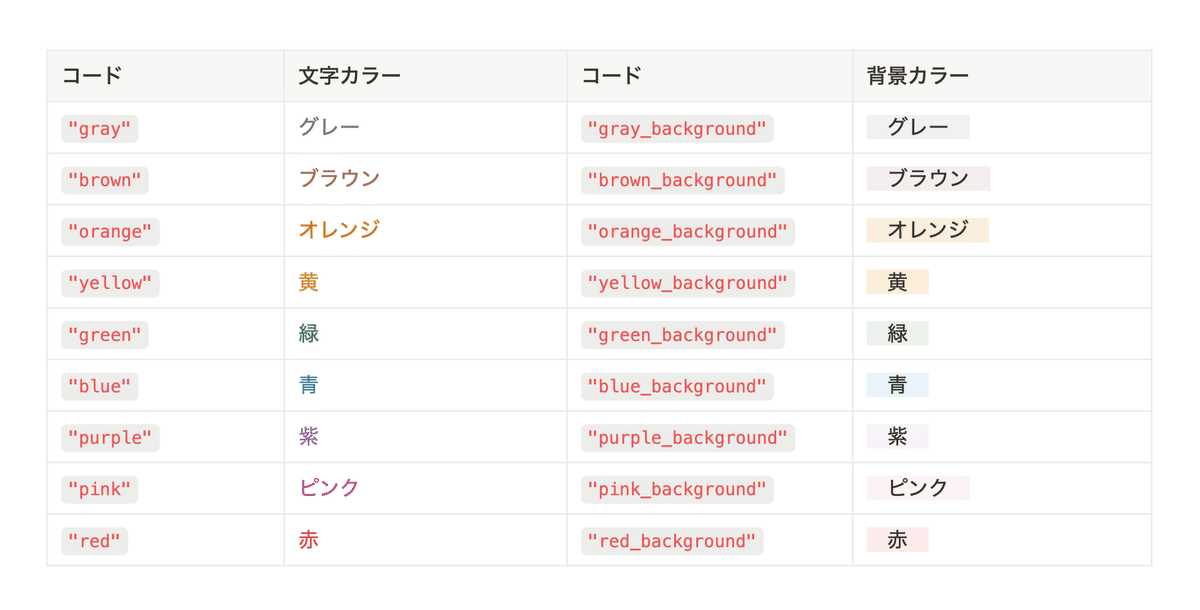
In this example, the part written after the "c" style is used. This time, both the text color and background color are specified.
If you want to change the color, just change the color name to one of the above.
/* ①If the status is completed, display "Completed" in the style specified in the brackets */
prop("status") == "completed", "completed".style("c, gray , gray_background "),
[Design idea distribution]
This time, I created 7 different display designs. You can copy and paste all the code below, so please choose the one you like best!
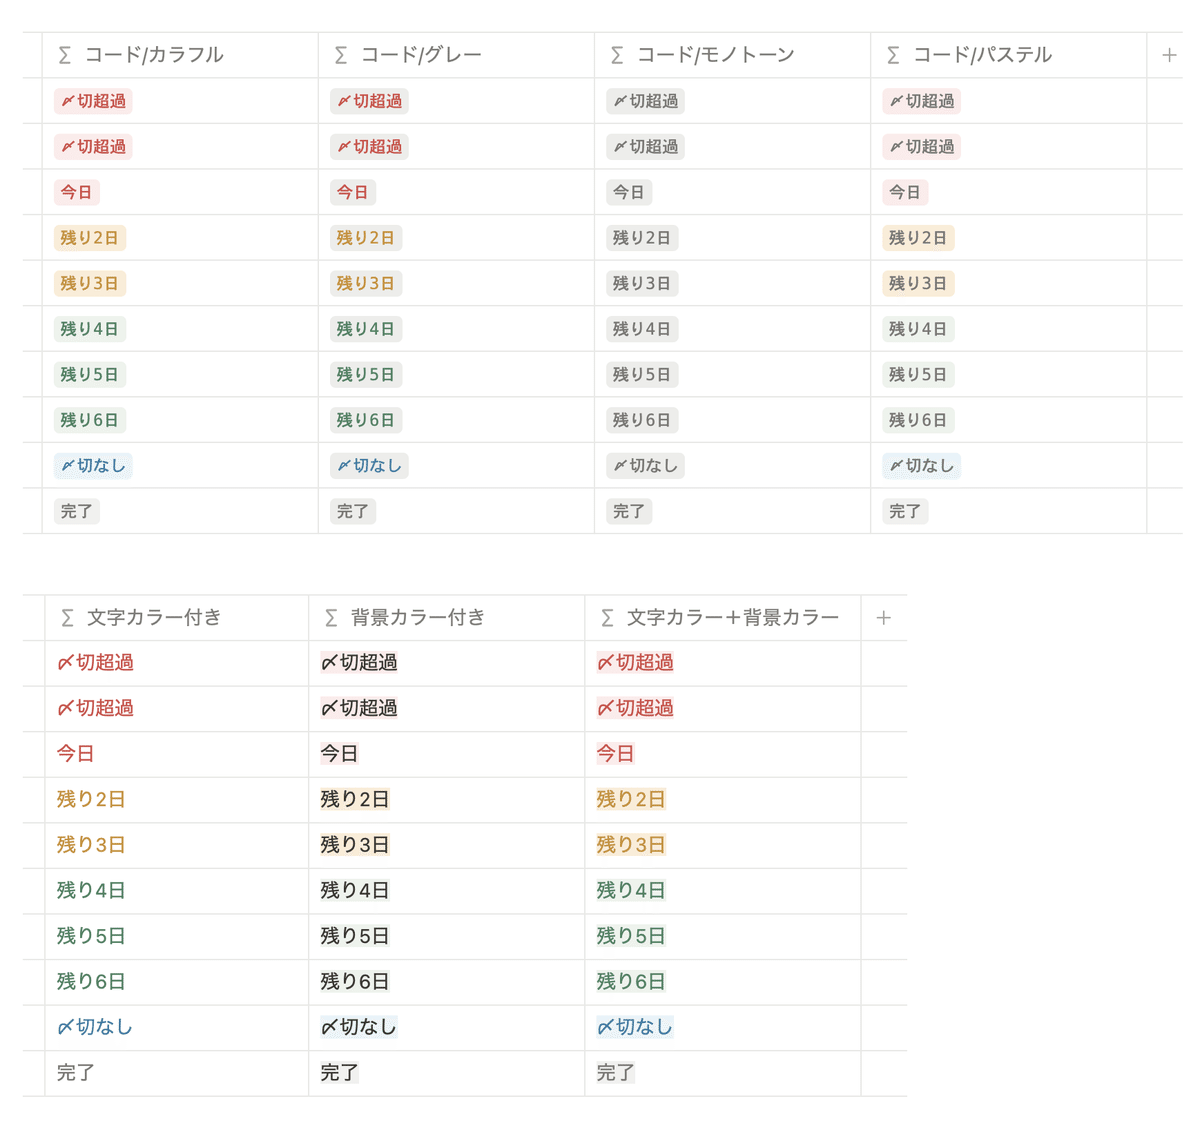
As an added bonus, we've included the style and color codes mentioned earlier so you can copy and paste them here. Please make use of them!
summary
This concludes our introduction to the formula for displaying deadlines in Notion as "X days left until deadline"!
Mathematical formulas can be difficult to use, but if you can master them, the range of things you can do with Notion will expand. Take this opportunity to try them out little by little.
Click here for a list of Notion templates available on "Notion in Life"!
The book "Notion Life Hacks" is now on sale! It includes 36 templates and provides plenty of practical tips on how to use Notion.
We also introduce how to use Notion and specific examples of its use on YouTube, so please take a look if you're interested.
We will continue to provide information about daily life and Notion to help you get the most out of your busy days.
Thank you for reading to the end!
See you in the next article.



![[Study Group Report] We held a Notion Formula Study Group!](http://kurashi-notion.com/cdn/shop/articles/2510_notionblog_formulaseminar_967275ed-a27f-4af8-ab02-34ca3ee3f96a.jpg?v=1762425140&width=1920)

