💡The " Notion Life Community " is now open!
By subscribing, you can read all paid articles , and you also get benefits such as Notion support for questions and study sessions . Click here to join the community where you can connect with many Notion users!
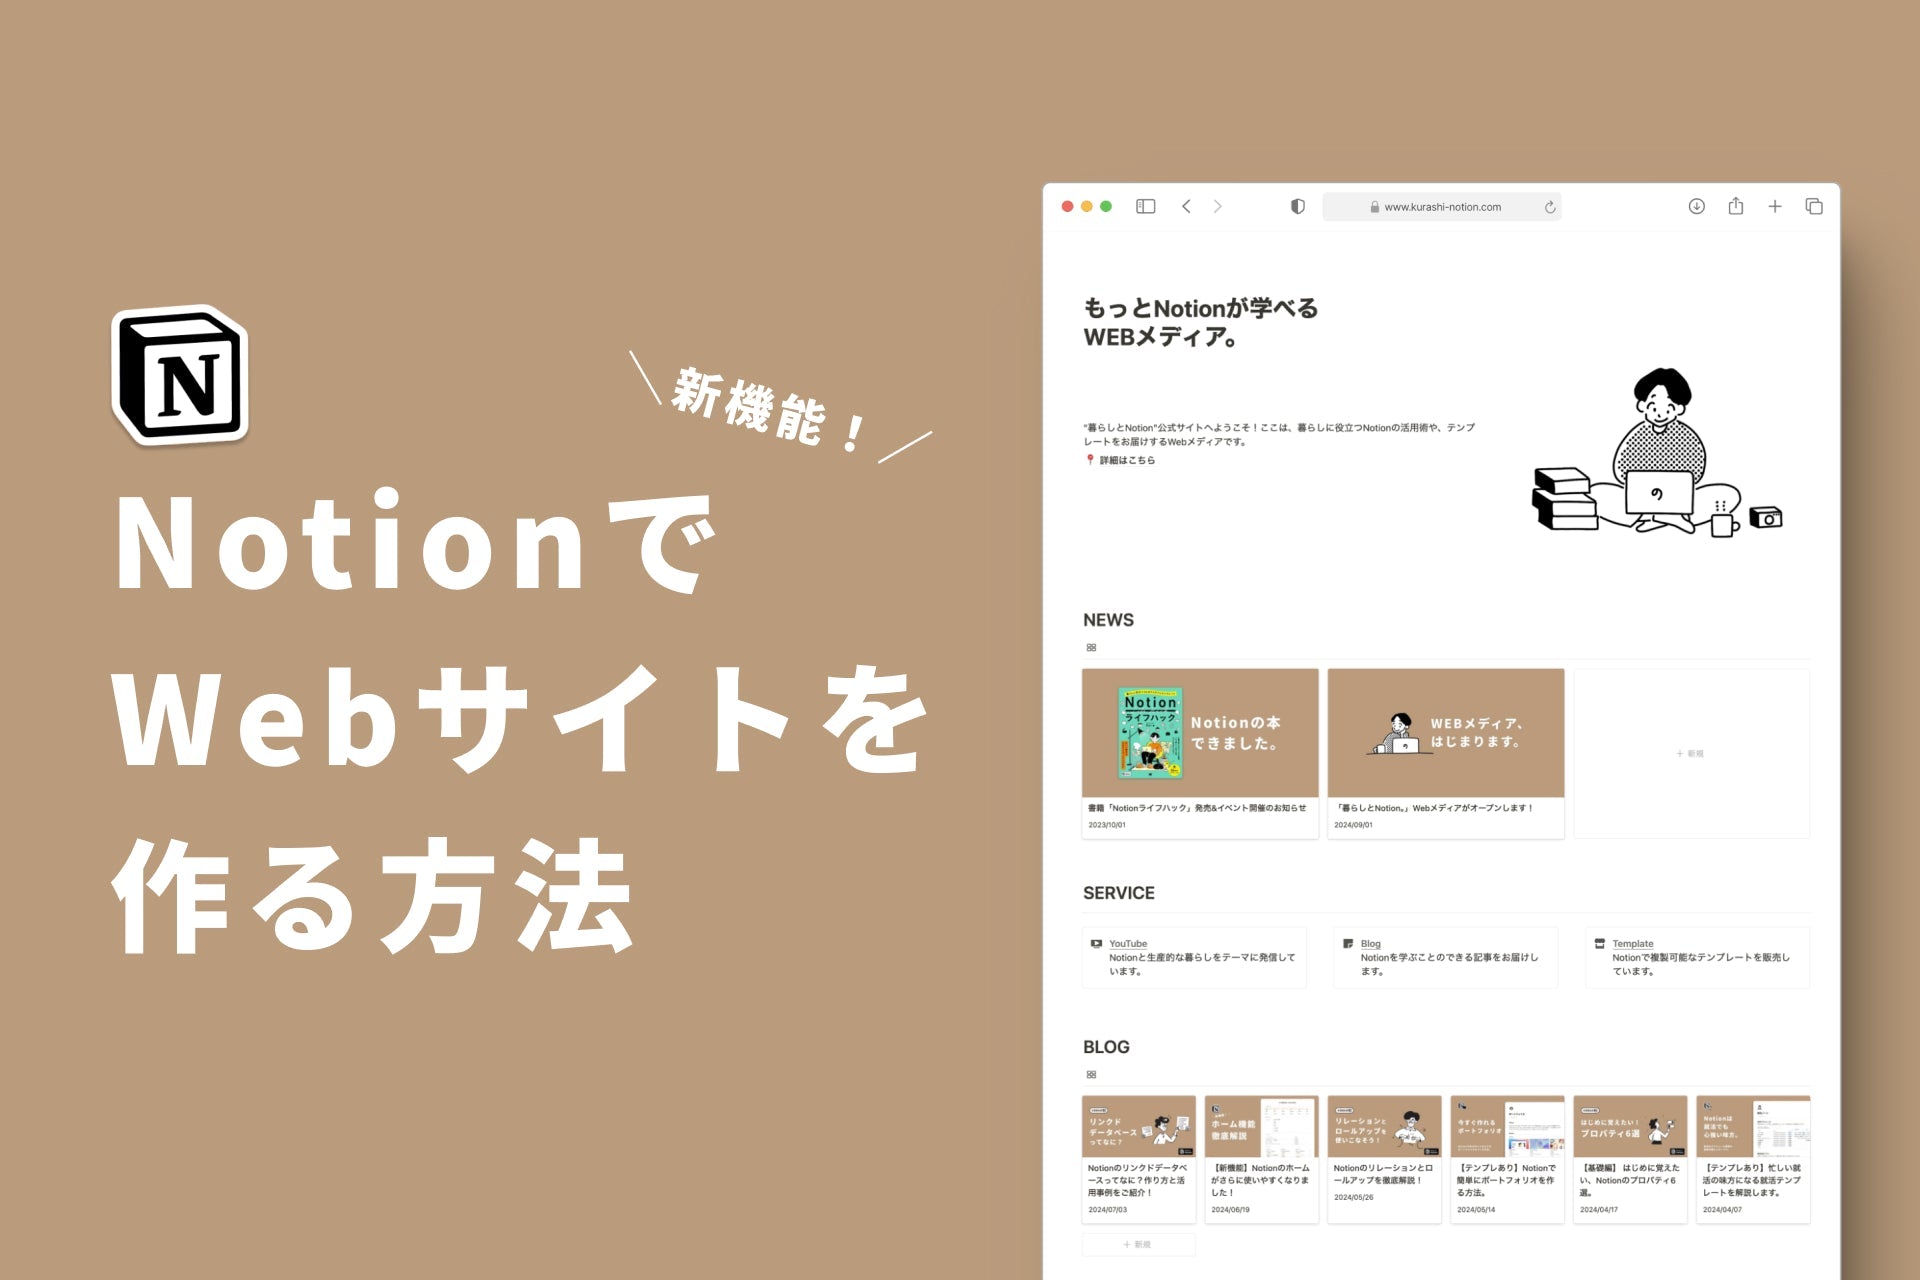
Finally, we have a new feature called "Notion Sites" that allows you to easily create a website using only Notion!
It has been possible to turn Notion into a website before, but this update makes it even easier to use and closer to a professional website.
This time, we will explain in detail how to use the Notion site and the newly added features using a site that we actually created!
🎬 Director: Rei
✍🏻 Writer: Mino Kurumi
1.What is the Notion site?
Notion already had the basic functionality to turn pages into websites, but the "Notion Sites" feature introduced in this update has evolved even further. New features have been added, making it easier to create more professional websites!
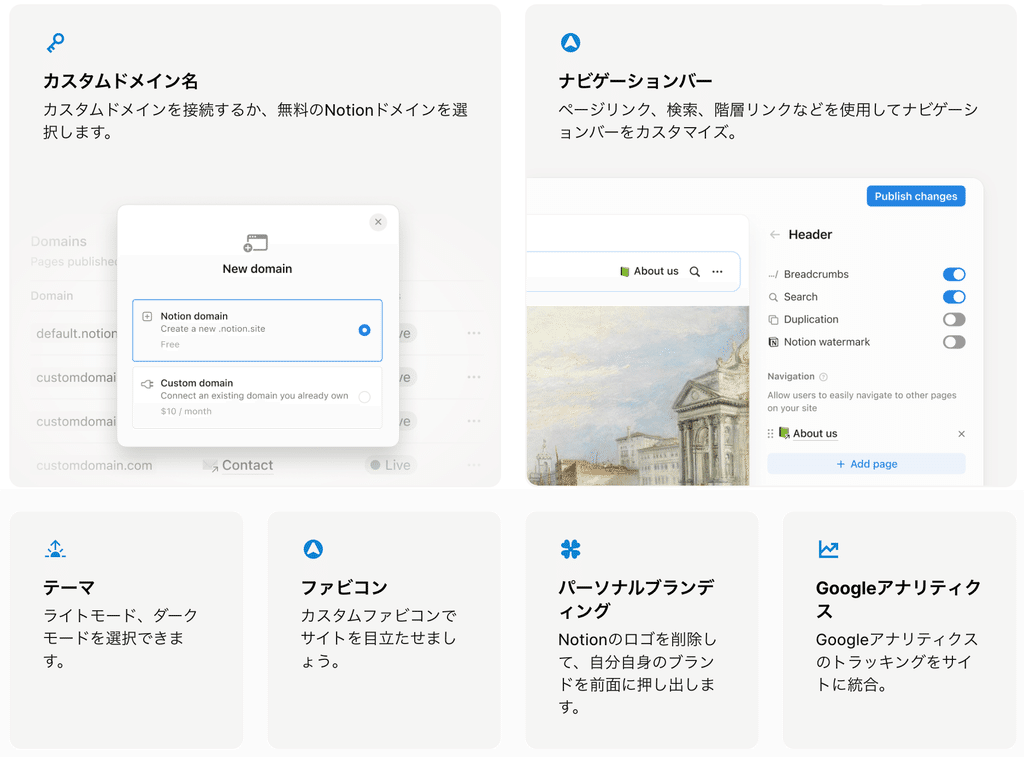
📝 What you can now do on the Notion site
・Setting up a custom domain
- Show/hide header
- Specify light mode or dark mode
- Specify preview and favicon
・Removal of the Notion logo
・Google Analytics settings
Until now, the above settings could only be made through an external service, but the key point of this update is that it can now all be done within Notion.
We will explain each function in detail and how to set it up later.
2. How to create a website
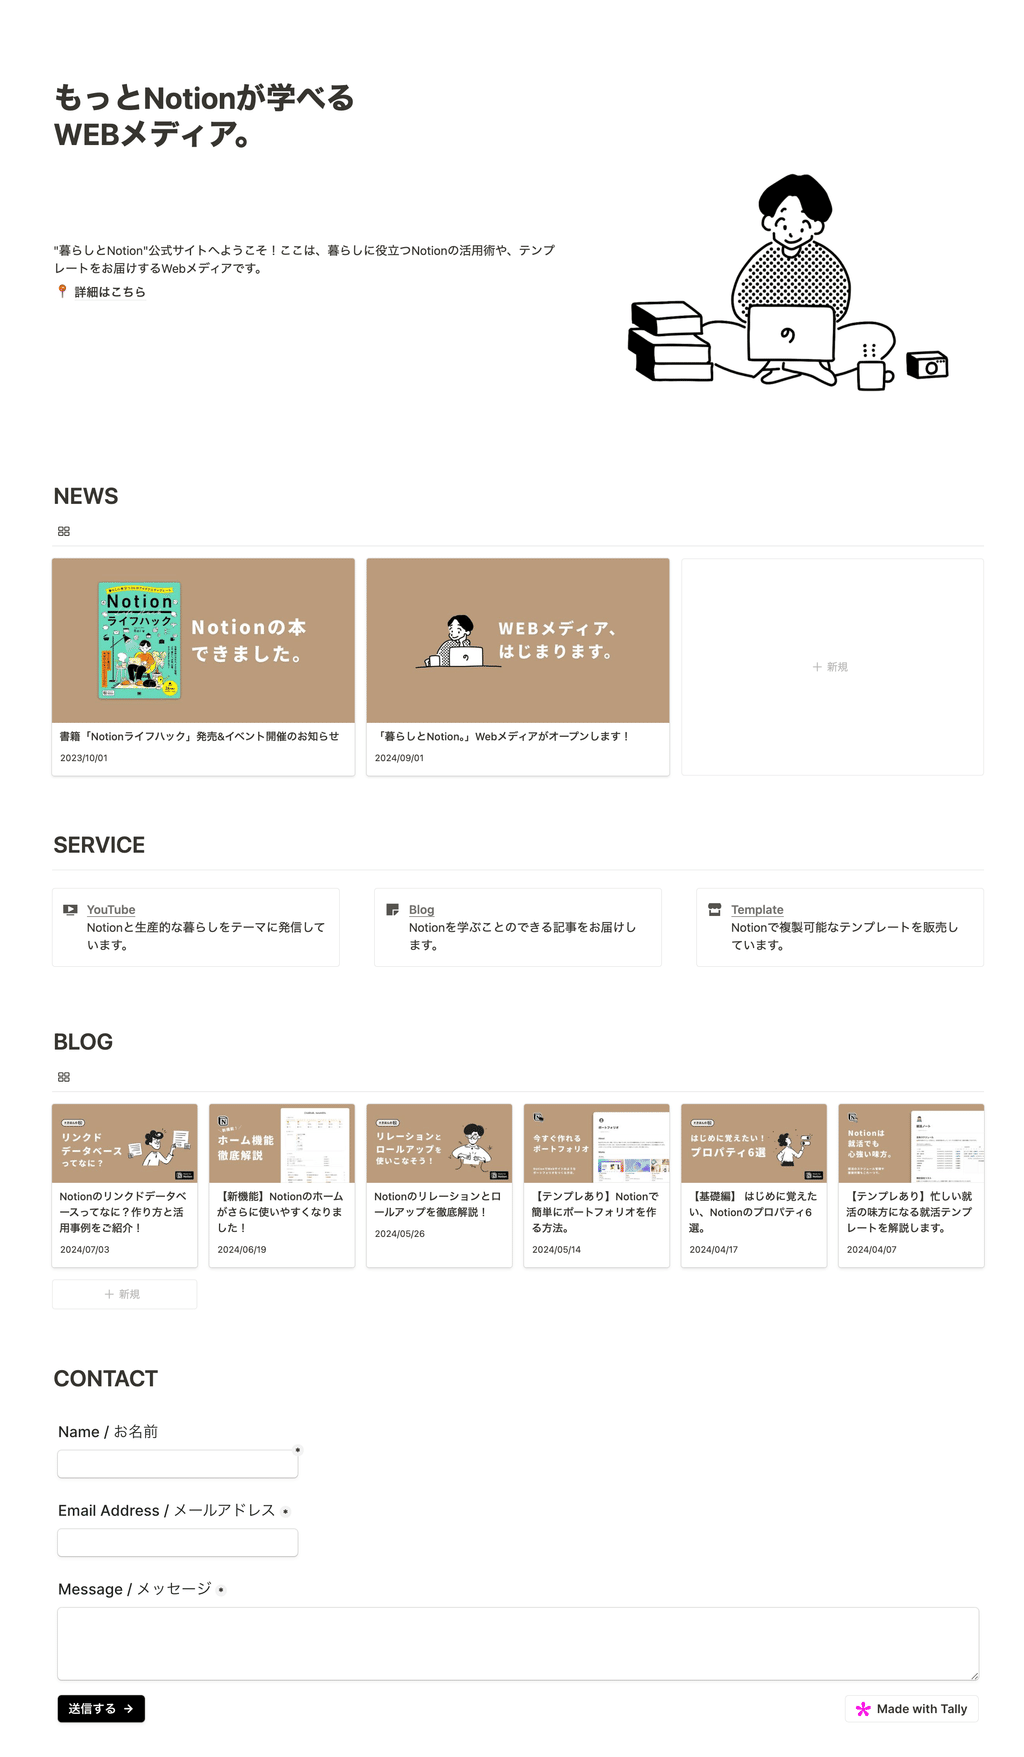
This time, we have recreated the official website of "Life and Notion" on the Notion site. From here, we will use this as an example to show you how to create a website-like page in Notion.
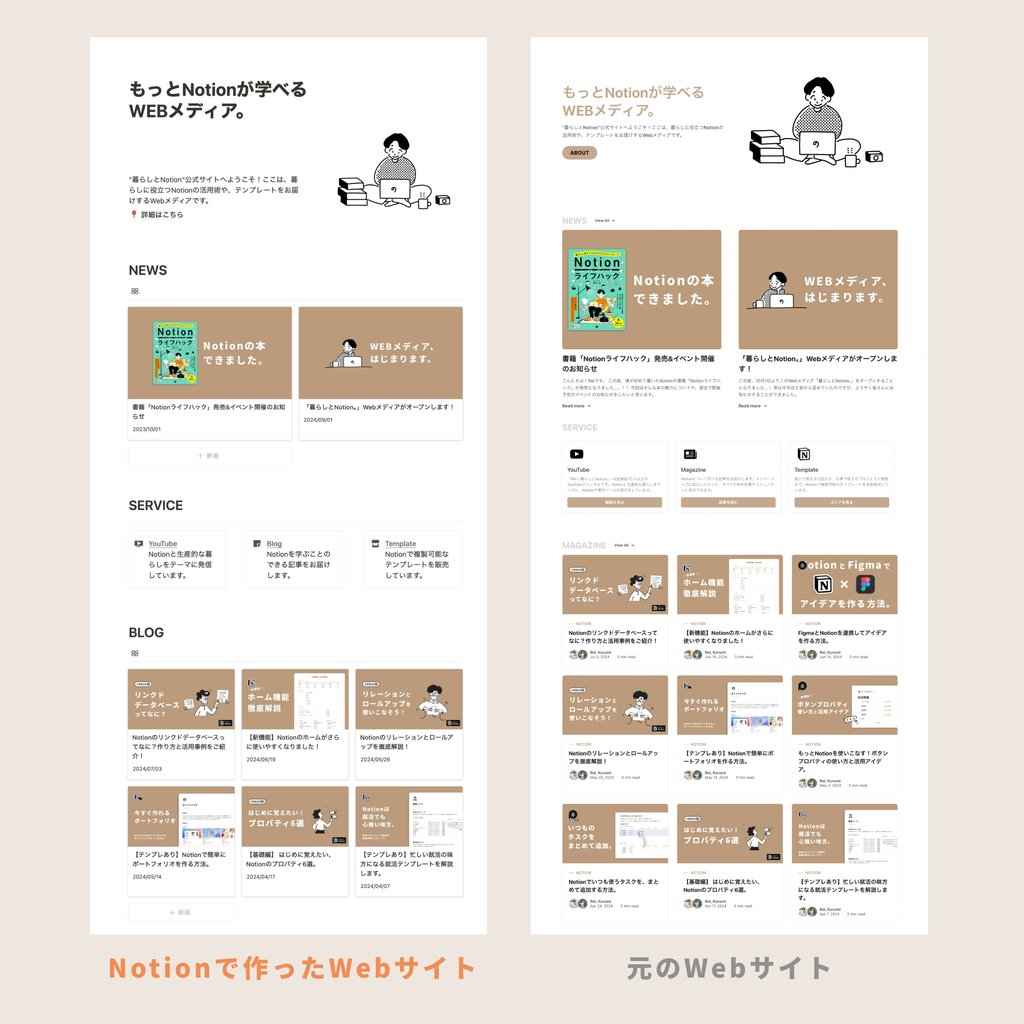
At first glance, it looks pretty close to the original page!
Header section
Below the title, there are two columns of blocks, with a description and a link to the ABOUT page on the left and an image on the right.
In the description section, I added blank lines to create some space to balance it with the adjacent image.
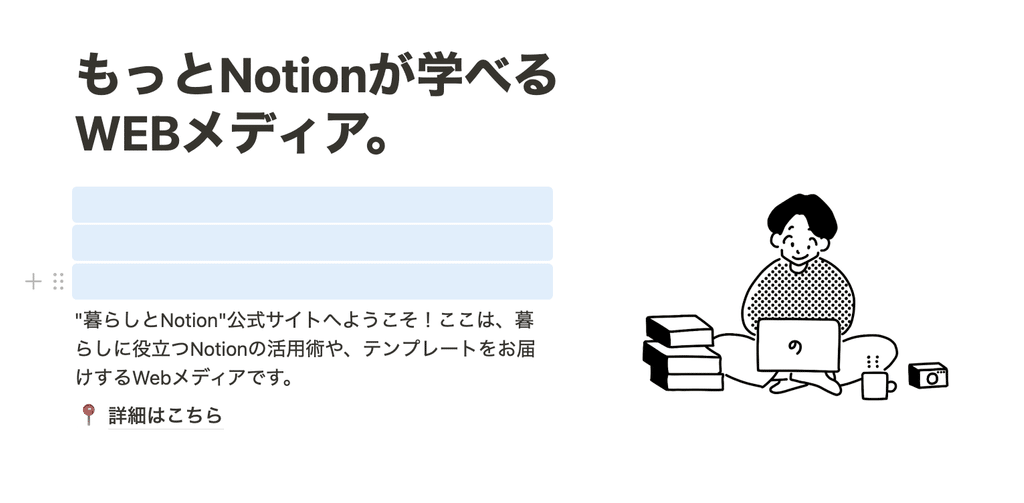
📝You can now crop your images!
With the recent update, you can now crop images placed in Notion. Simply place an image and click the crop icon in the upper right corner.
NEWS
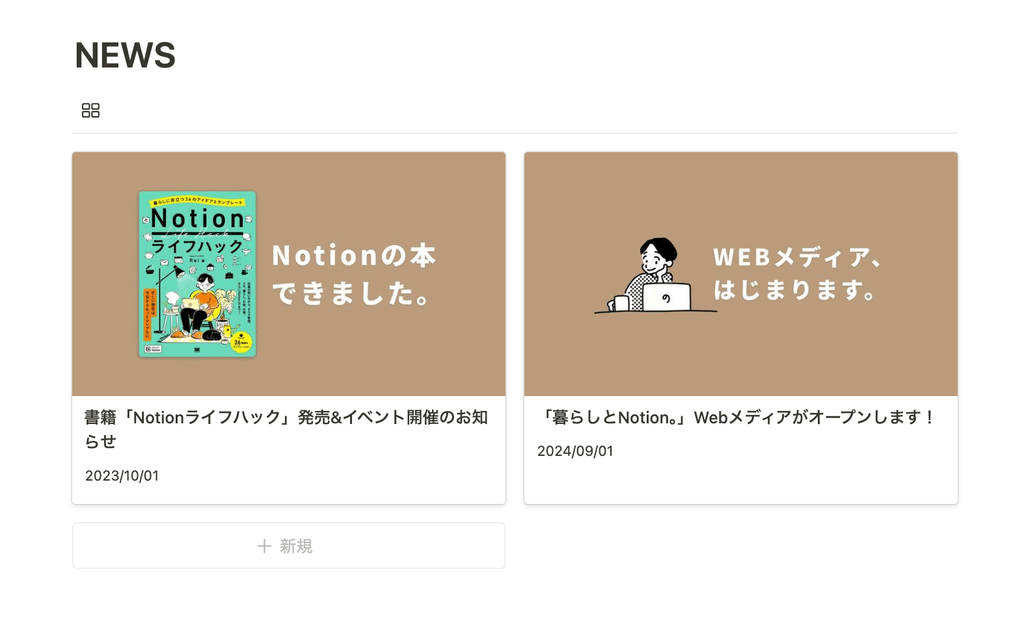
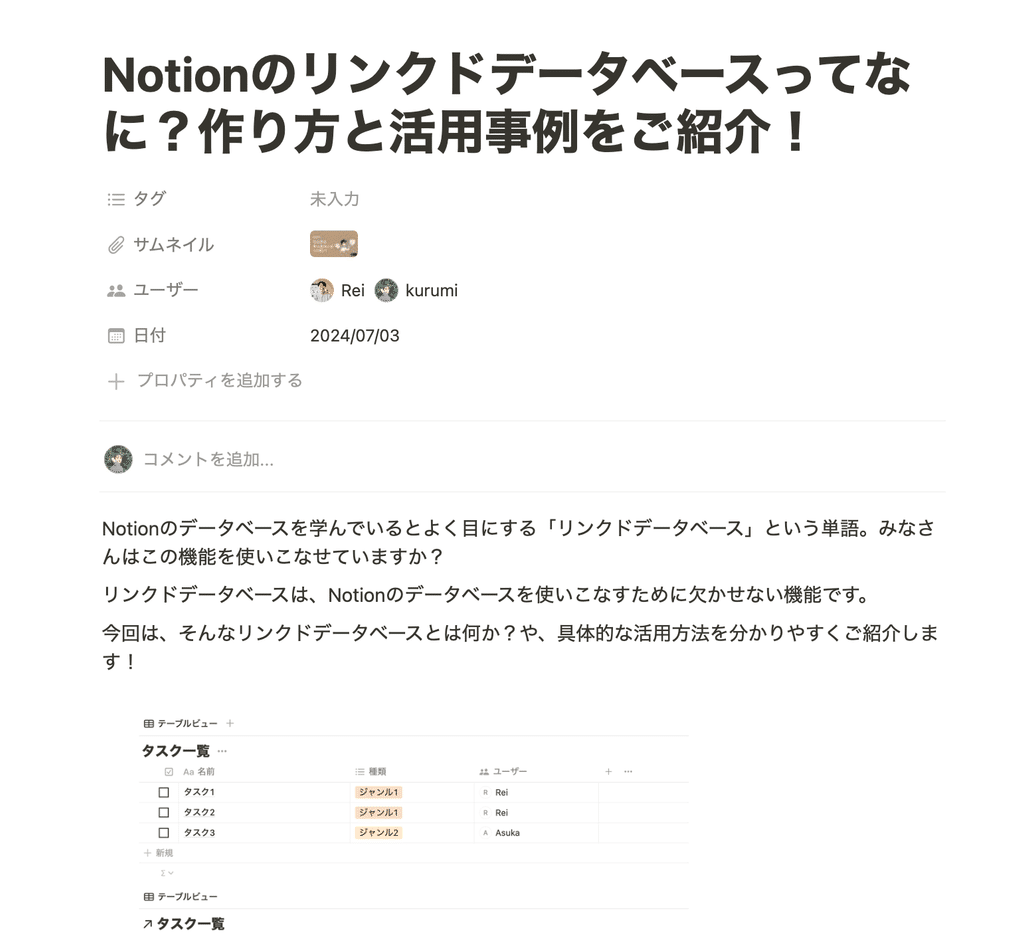
NEWS articles are displayed using the database's "Gallery View." The top image of each article is displayed, making it look like a list of blog articles, and when you open the page, you can read the article content.
If you use only half-width spaces for the view name, it will only contain the icon, which makes it look simpler and is recommended.
Service details
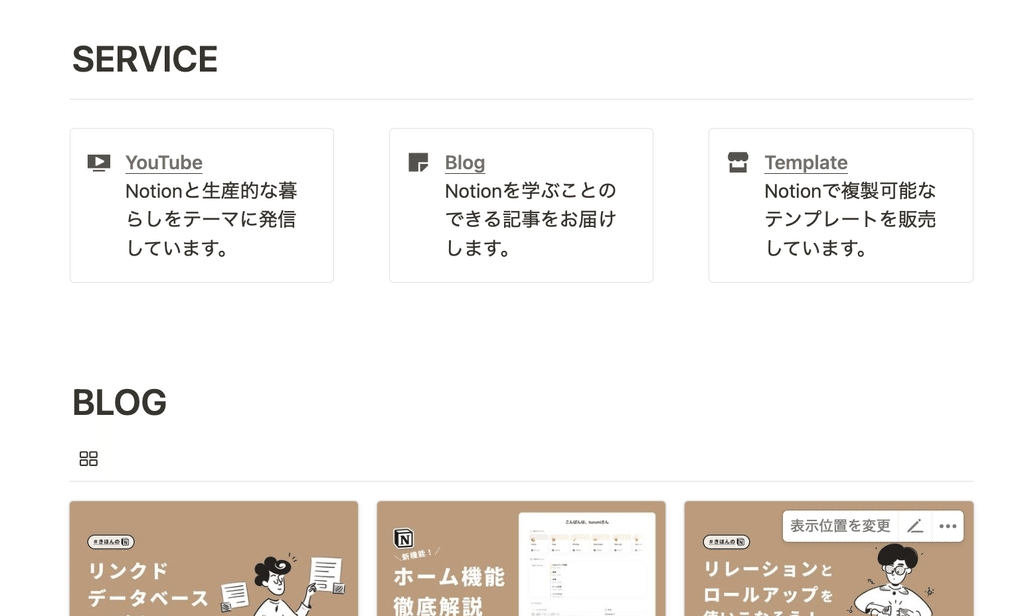
I created three columns and placed callout blocks in them. Select "Callout" from "+" and set the color to "No background color" to create a simple design surrounded by lines.
I added a link to the title. You can specify a URL by selecting the text and clicking "Add Link."
Blog
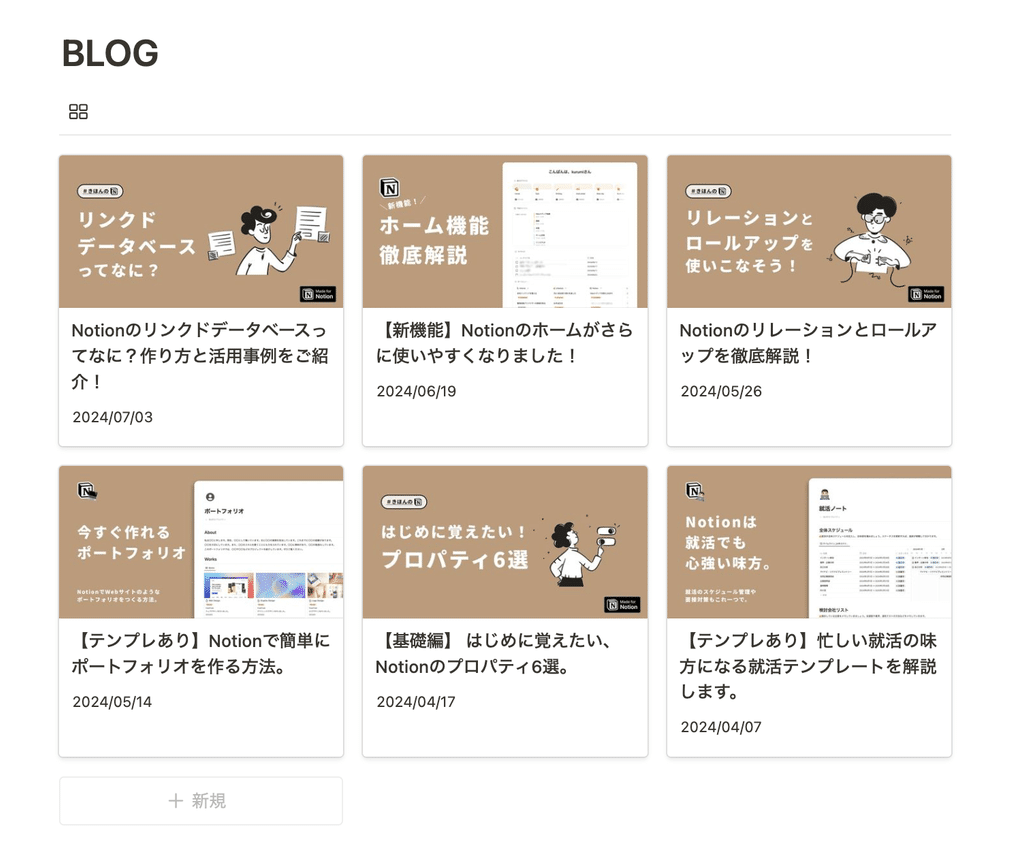
Like NEWS, the list of articles is displayed using a gallery view of the database.
If you use it for blogging purposes, you can write and edit articles on this Notion page, which will make operation much easier.
Form
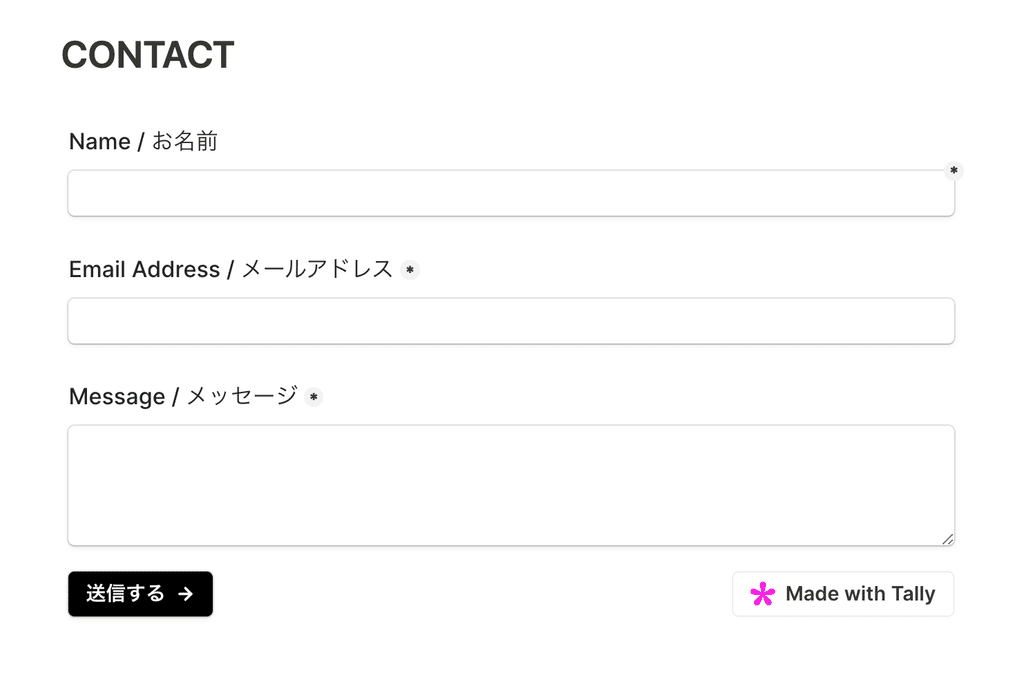
Finally, I embedded the form using an external service called " Tally " that works with Notion. This service works with Notion in the background, and the information entered here is sent to a specified database.
I'll be writing a detailed article about Tally, so please sign up for membership and wait!
3. Publishing to the public and how to set up new functions
Next, we'll show you how to publish your Notion page to the public. We'll also explain how to set up new features!
3-1. Publish the page to the public
The procedure for publishing to the outside world is very simple, and you can issue a URL by following the steps below.
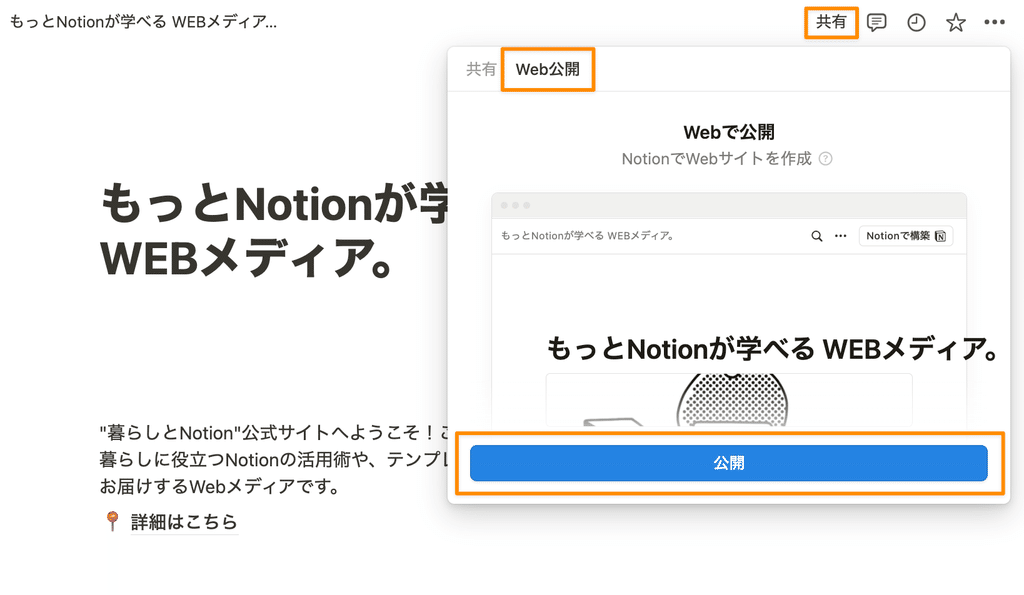
1. Click "Share" in the top right corner.
2. Select the "Web Publishing" tab and click "Publish"
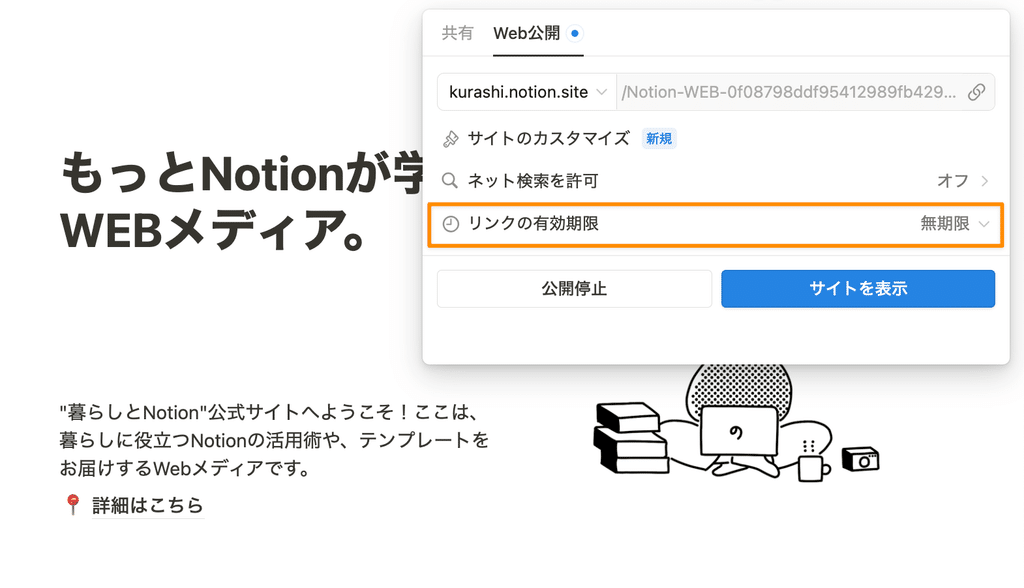
To allow people to find your page through search, turn on "Allow online searches." Here you can set the title and text that will actually be displayed on the search screen.
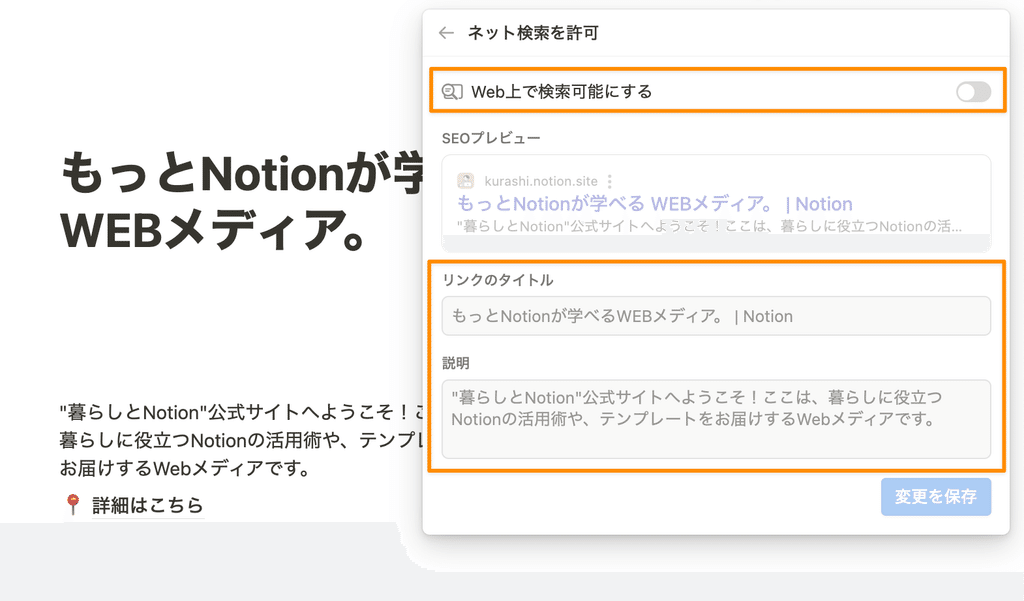
Also, if you want to keep it available on your website, set the "Link expiration date" below to "Unlimited."
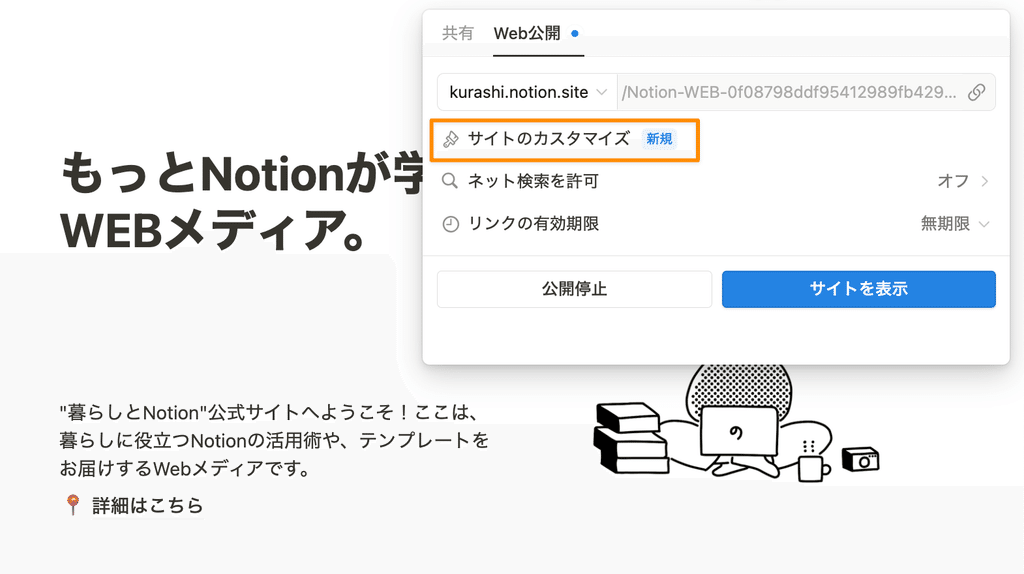
3-2. Customize your settings
Next, let's customize the detailed settings that were added in the update. You can set the new features by clicking "Customize Site" on the Web Publishing screen.
The following items can now be newly configured:
- Share preview : The image that will be displayed when you share the link on social media such as LINE or Twitter.
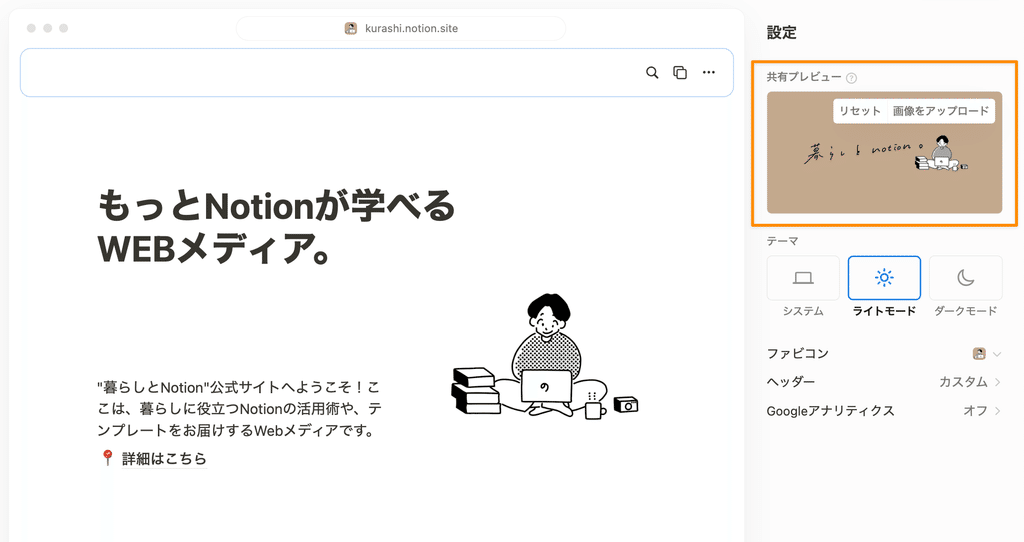
- Change theme → This setting will always display in light mode (dark mode) regardless of the other person's environment. (The previous setting that the appearance depended on was "System"). Recommended when you want to specify the environment for images or design.
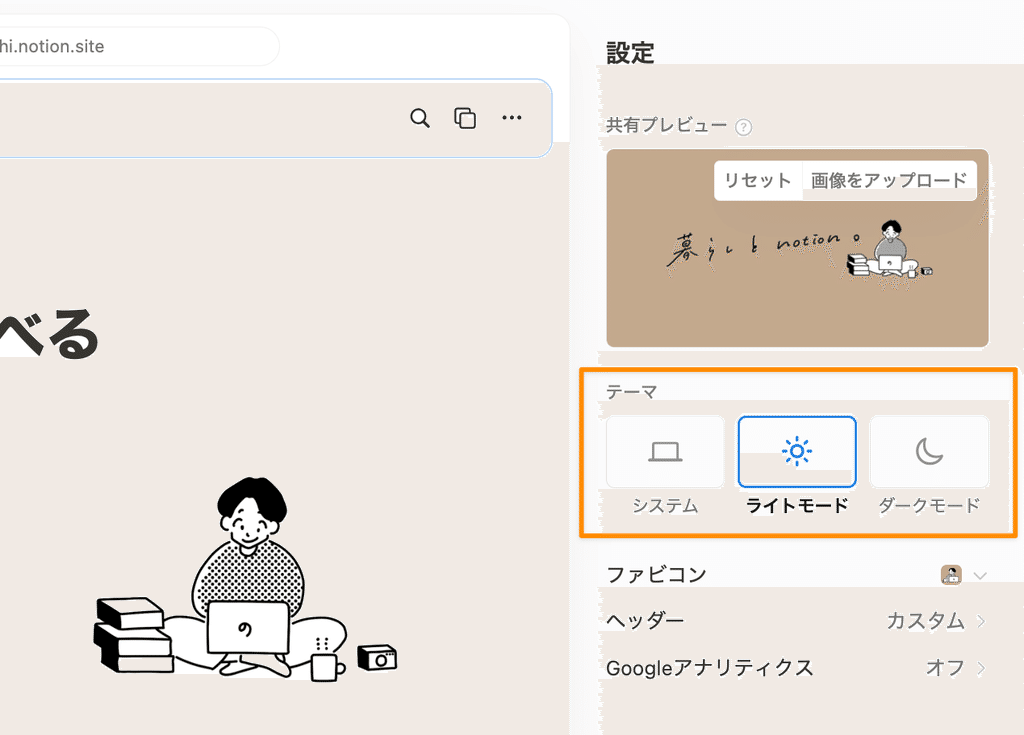
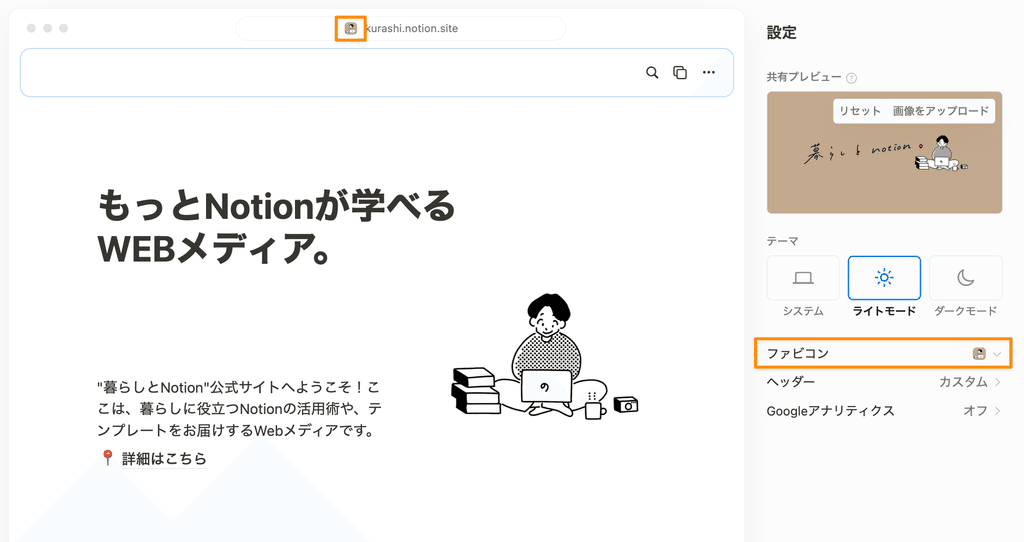
- Favicon : The icon that appears next to the title when you open a website or perform a search.
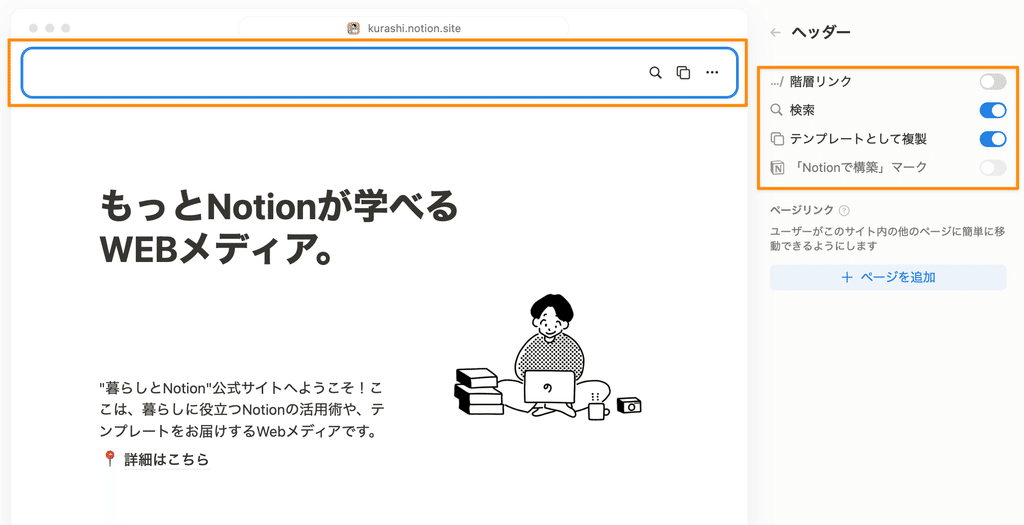
- Header - You can now choose to show or hide the hierarchy at the top of the page, the "Built with Notion" mark, the search mark, and the template duplication button.
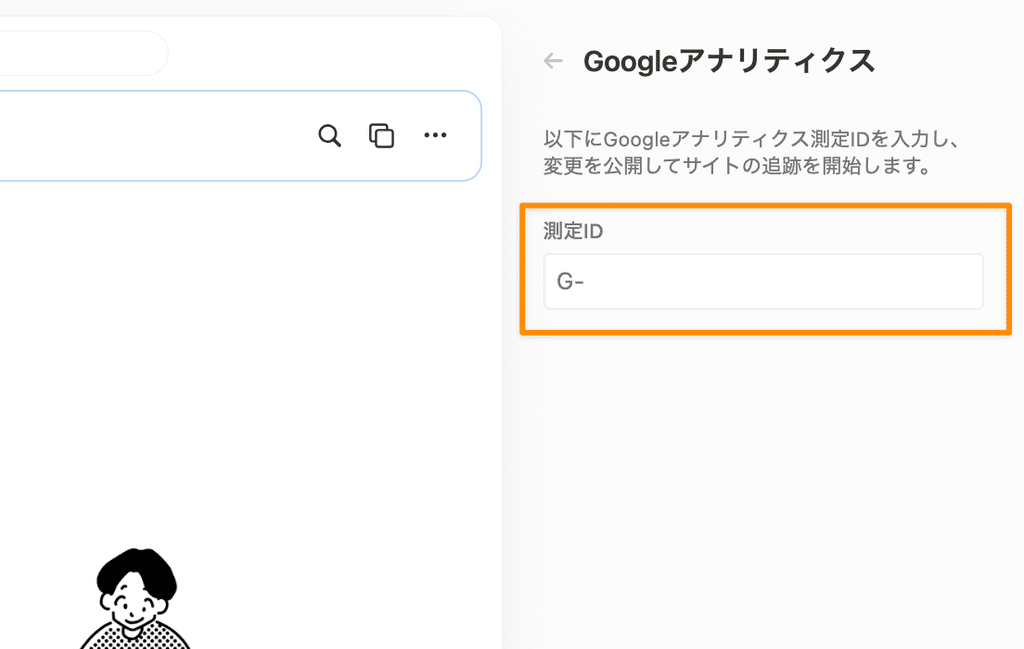
- Google Analytics →By setting an ID, you can check analytics such as how many people visited your website on Notion.
4. Suitable uses and pricing plans
The "Notion Site" introduced this time makes it very easy to create web pages, making it perfect for things like link collections to post on social media or portfolios.
It is also recommended for use in business situations where you want to make a page temporarily public but want to set the domain properly, such as a company's recruitment page, which is updated frequently and can be conveniently edited quickly, or a page that lists community rules.
Finally, we will introduce what you can do with each pricing plan.
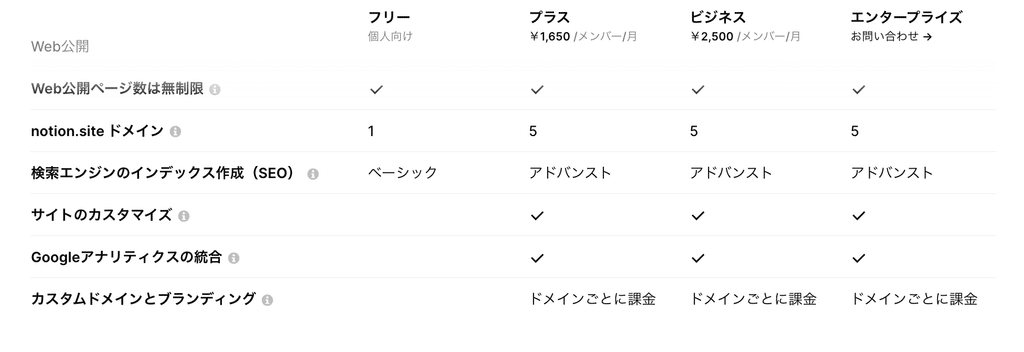
🔎 What you can do with the free plan
- Publish to an unlimited number of sites
- You can use one Notion domain, "●●.notion.site"
- You can search online
💰 What you can do with paid plans (Plus plan and above)
- You can acquire up to five different Notion domains, "●●.notion.site"
- Customizing your site
- You can set a homepage for your domain (a short URL ending in "●●.notion.site")
- Google Analytics settings
🔧How to set your domain's homepage
Open "Sites" from "Settings" in the sidebar to see a list of your currently published sites. Select a page in the "Homepage" at the top and you can set that page as a short URL ending in "●●.notion.site".
Please note that the new site customization features (changing themes, setting favicons, etc.) are not currently available with the free plan, so if you want to set these up or use multiple domains for different purposes, you will need to sign up for a paid plan.
Additionally, if you want to use your own domain (such as "●●.com" or "●●.jp"), you will be charged an additional fee. This comes to about 1,200 yen per month, so it's best to compare it with other services before making your decision.
🔗Click here for more information about the plan
summary
This concludes our explanation of "Notion Sites," which allows you to easily create websites using Notion!
This is a feature I would highly recommend to anyone who has always wanted to create their own website, even if it's not a full-fledged one. I think the biggest advantage is that you can now take the next step and acquire a domain.
The Notion page for the website we created this time can also be purchased as a template. If you would like to use it as a reference for creating your own website, be sure to check it out!
Click here for a list of Notion templates available on "Life and Notion"!

The book "Notion Life Hacks" is now on sale! It includes 36 templates and provides plenty of practical tips on how to use Notion.

We also introduce how to use Notion and specific examples of its use on YouTube, so please take a look if you're interested.

We will continue to provide information about daily life and Notion to help you get the most out of your busy days.
Thank you for reading to the end!
See you in the next article.


![[Study Group Report] We held a Notion Formula Study Group!](http://kurashi-notion.com/cdn/shop/articles/2510_notionblog_formulaseminar_967275ed-a27f-4af8-ab02-34ca3ee3f96a.jpg?v=1762425140&width=1920)