💡The " Notion Life Community " is now open!
By subscribing, you can read all paid articles , and you also get benefits such as Notion support for questions and study sessions . Click here to join the community where you can connect with many Notion users!
Creating slides is often necessary in work situations such as presentations and internal meetings.
Many people create presentations using PowerPoint or Google Slides, but there are times when it can be a bit tedious.
This time, we will explain how to easily create presentation slides using Notion, which will be useful in such situations!

Not only can you embed images and videos, but you can also collaborate and easily share presentation materials. Try creating stylish and convenient slides with Notion.
🎬 Director: Rei
✍🏻 Writer: Mino Kurumi
1. I tried making slides with Notion
Let me show you the slides I created with Notion.
This time, I created an introductory slide about this web media, "Life and Notion."

👇Click here for the full page
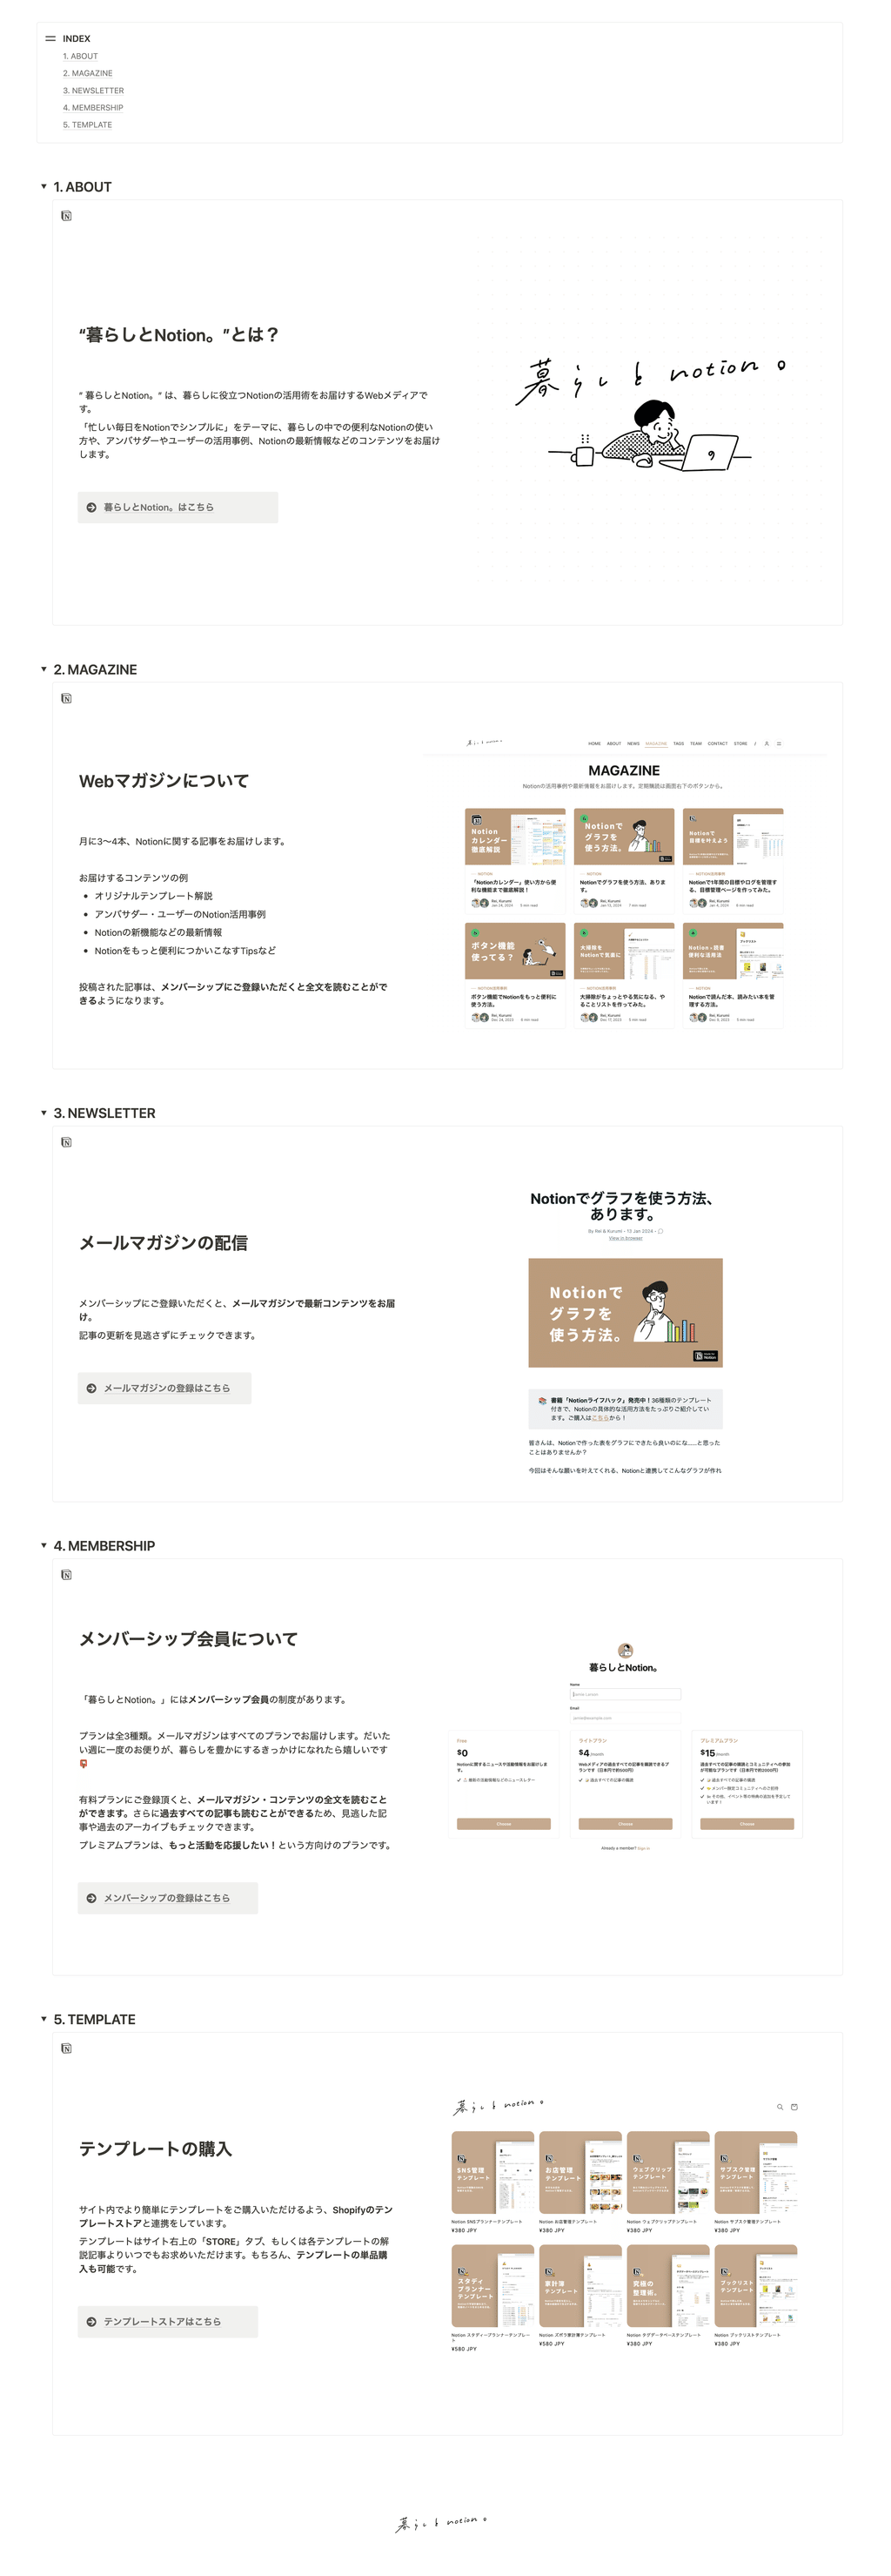
This slide deck was actually made using only Notion, and no other integrated services were used. The only features used were "callouts," "toggles," and "headings," making it incredibly simple!
When you want to give a presentation, just open this page and scroll down. You can also issue a URL, making it easy to share your slides.
From here, we will introduce how to create this slide and some convenient ways to use it that are unique to Notion.
2. How to create slides
Now, let's take the page we just showed you as an example and explain how to create it by dividing it into the "cover," "table of contents," and "slides (contents)."
Finally, we will also distribute the page we introduced earlier as a template.
2-1. Create a cover
First, create the cover of the slide.
1. Create a new page in Notion and give it a title
2. Select "2 columns" from "+" or enter "/2" to split the layout into two columns
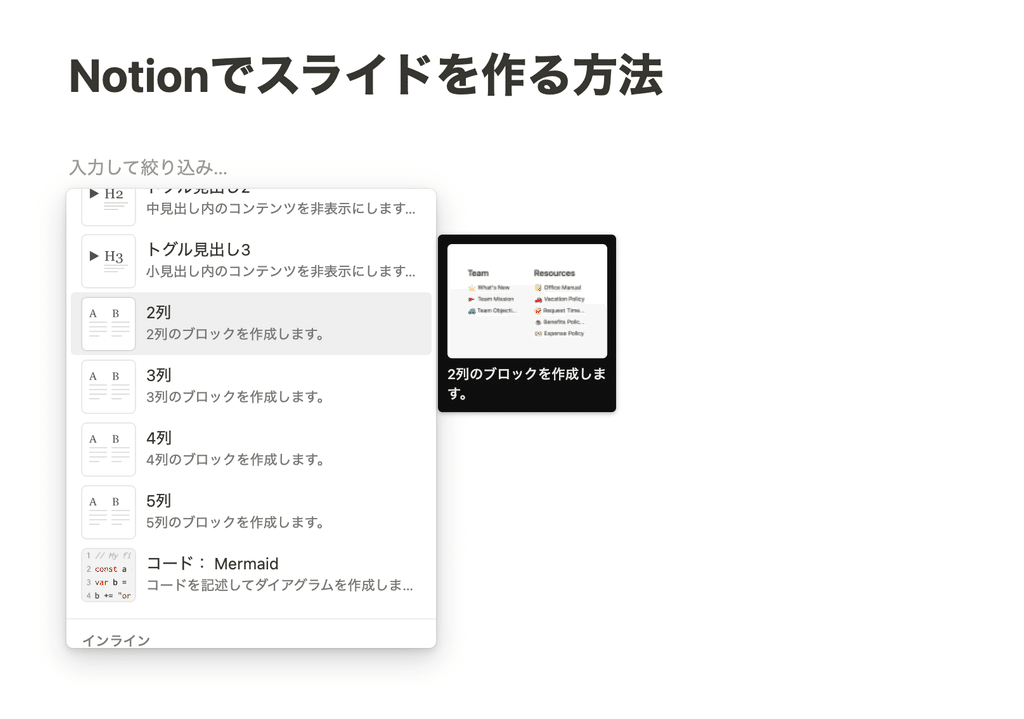
3. Copy and paste the image and enter a description.

📝 Notes
If you want to adjust the size, you can do so using the bar that appears on the edge of the image. You can also select left, center, or right alignment from the "Alignment" icon in the top right corner of the image.

2-2. Create a table of contents
Next, let's create a table of contents. We'll use the "callout" function to create the outline of the presentation.
1. Select "Callout" from "+" or enter "/callout" to create a callout
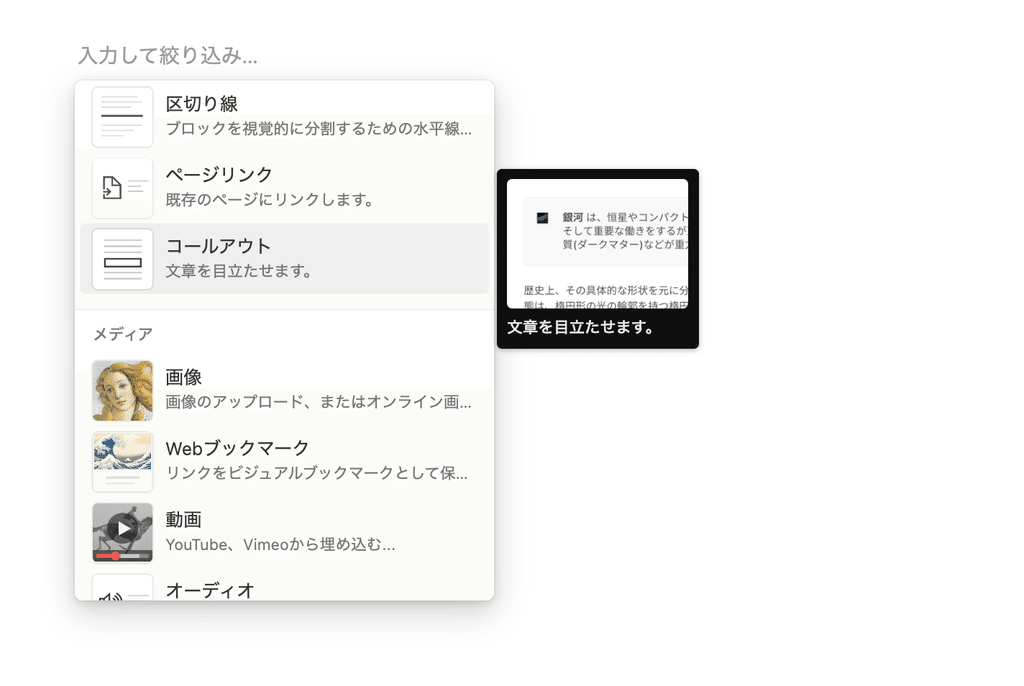
2. Change the icon and background color to your liking and enter a title.
3. Outside the callout, click "+" and select "Table of Contents" or type "/Table of Contents" to create a table of contents.
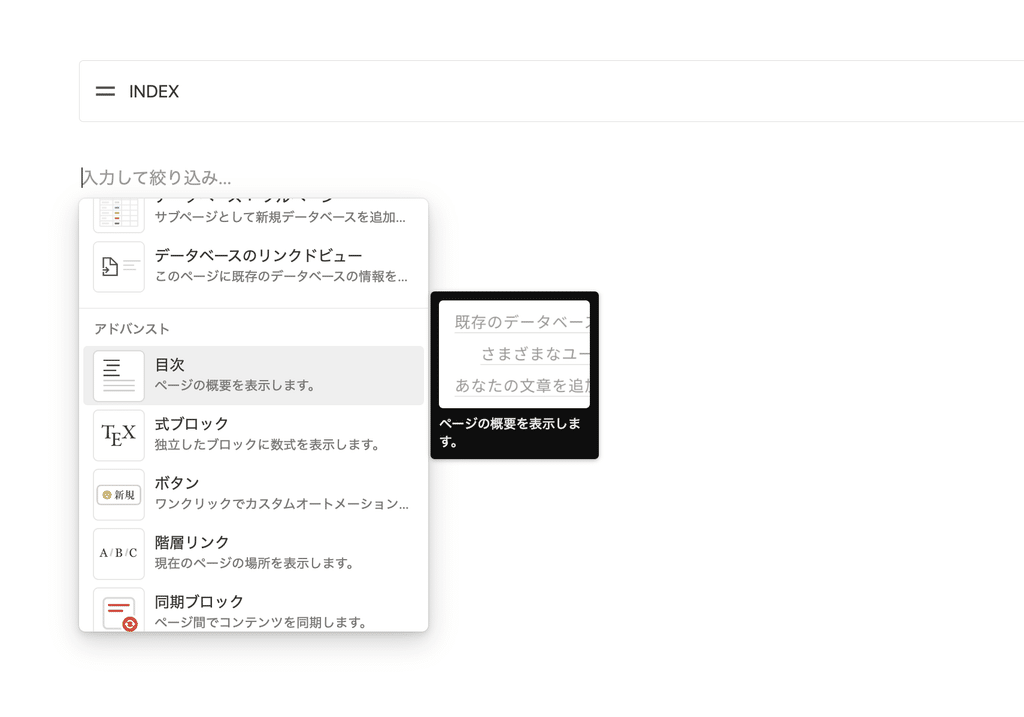
4. Grab the "⋮⋮" mark on the left side of the table of contents and move it into the callout
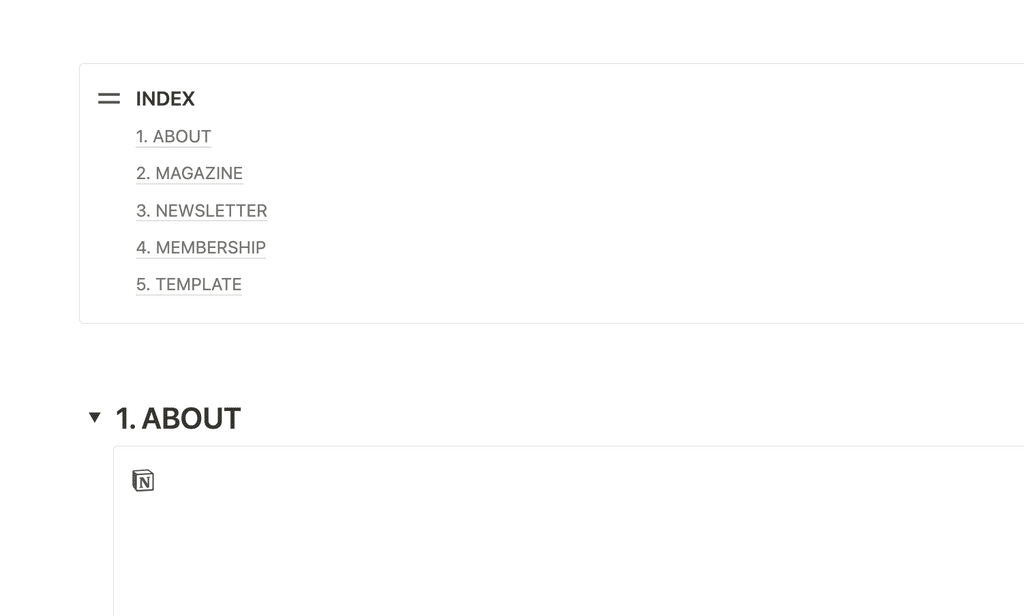
The table of contents is now complete.
2-3. Create slides
Next, we will create the content of the slide.
1. Select "Toggle Heading 2" with "+" or "/2"
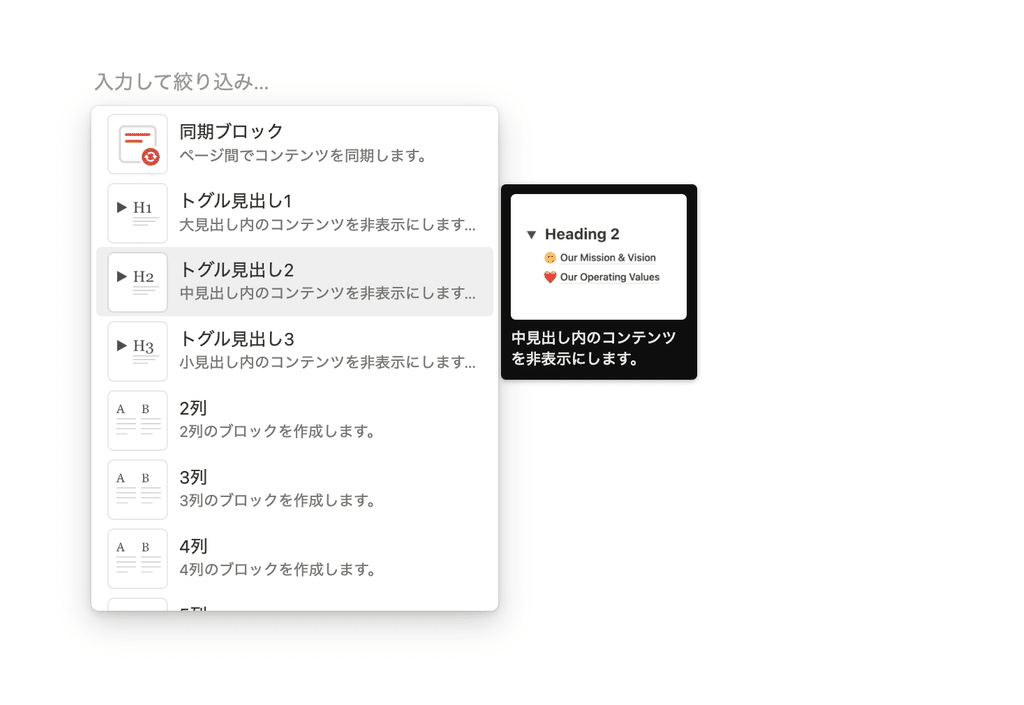
2. Include the slide title in the toggle header (this will appear in the table of contents)
3. Create a "callout" within the toggle
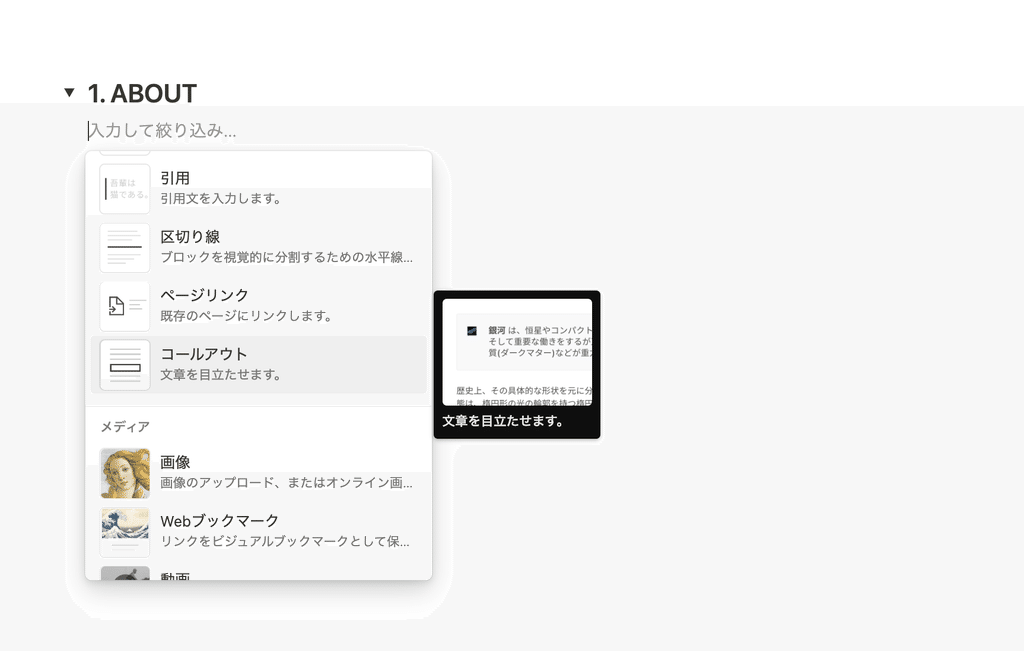
4. Change the icon and background color to your preferred design, and leave the title blank by adding a space.
5. Create the content of your slides within the callouts
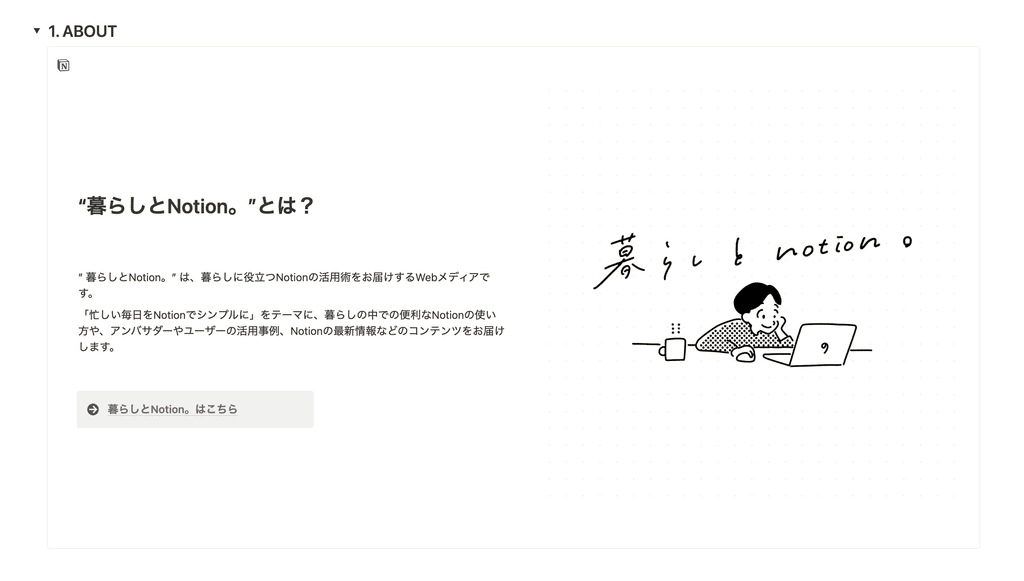
Adding margins above and below the callout and stretching it to fill the screen will make it look more like a slide.
The callout can also be divided into two columns, so this time I displayed the text on the left and the image on the right.
Once you have created all the slides in the same way, your presentation materials are complete.
💬 Links are displayed stylishly
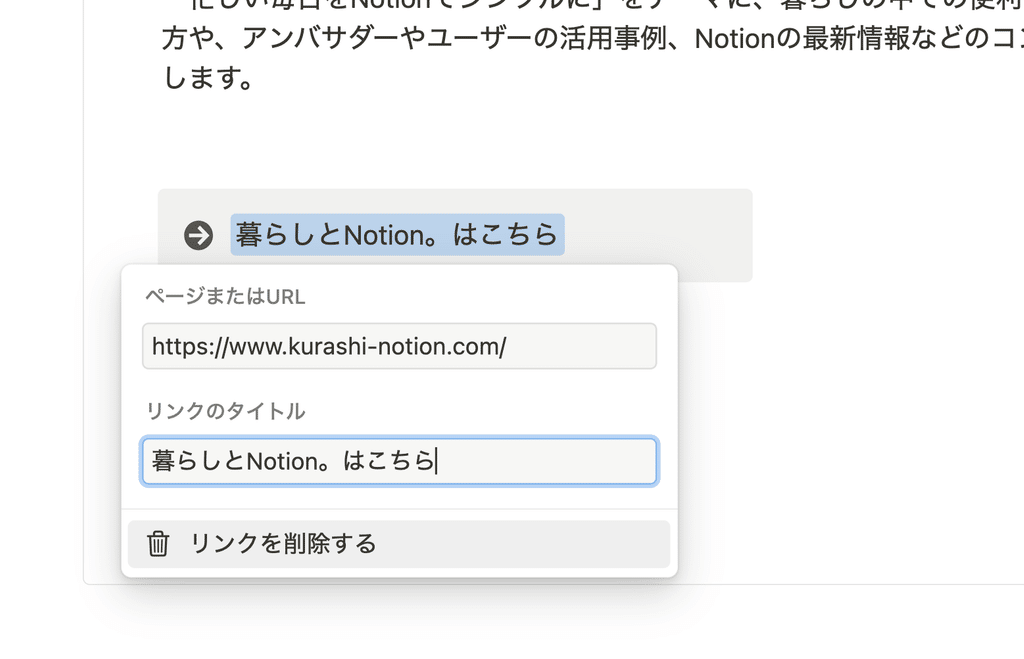
If you want to embed a link in a slide, we recommend using a callout to create a link button.
1. Create a "callout"
2. Select your favorite icon and enter text such as "Click here"
3. Select the text and click "Link"
4. Enter the URL you want to jump to and press Enter.
3. How to use it and useful points
Finally, we've summarized how to use slides created with Notion and some useful features that are unique to Notion.
3-1. When giving a presentation...
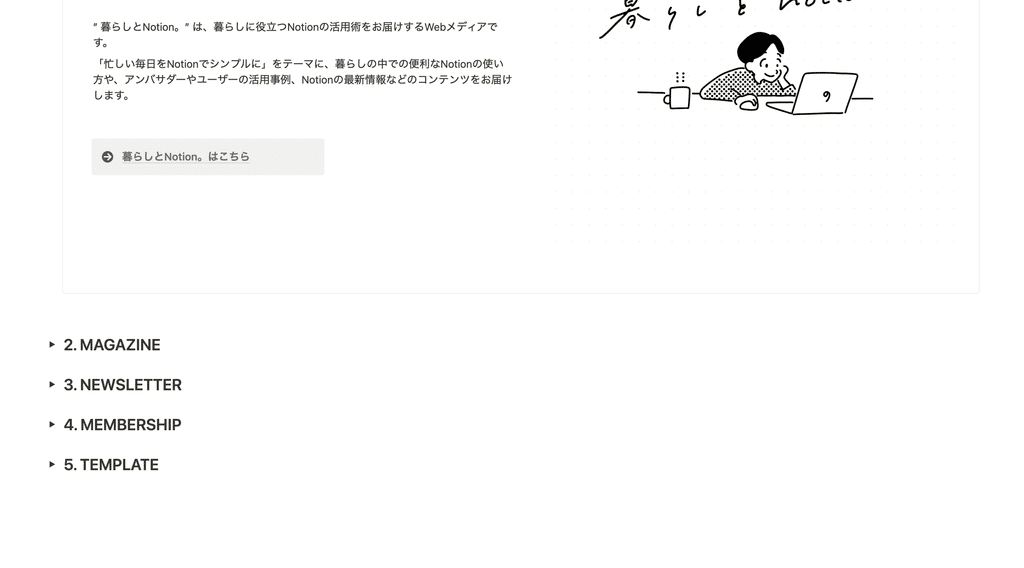
Once you've created your slides, simply scroll through them from the top to bottom when you're presenting.
"Toggle headings" can be closed like this, so it's recommended to close them in advance and then open them from the top down when you're presenting.
3-2. Sharing documents is easy
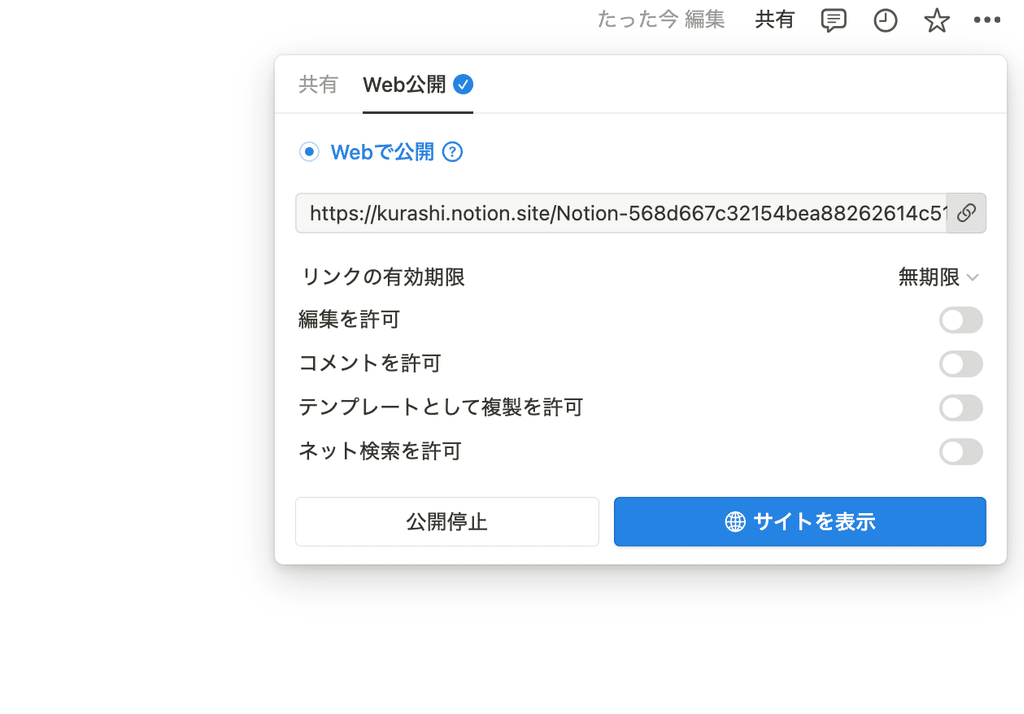
Notion allows you to issue a page URL, making it easy to share materials after your presentation is over.
1. Click "Share" in the top right corner, then select "Publish" in the "Web Publishing" tab
2. Edit page permissions, such as editing, commenting, duplicating, and copy link
You can easily share documents by simply copying and sharing the link.
3-3. Collaborative editing is also possible
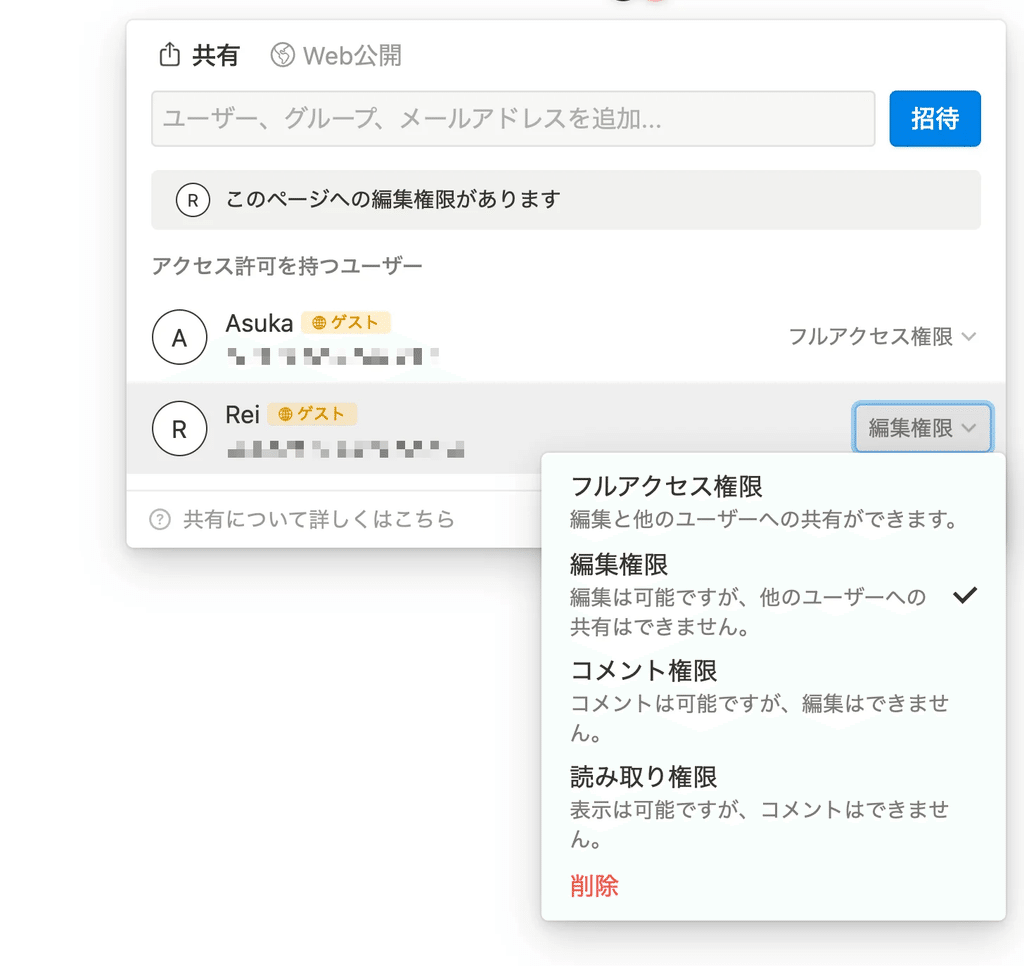
If you want to create a slide deck with someone, Notion lets you invite users to your page and collaborate.
1. Select "Share" in the upper right corner and choose who you want to collaborate with.
2. Select access permissions and click "Invite" (if you want to collaborate, select "Full access" or "Edit permission")
Now, your invitees can join you in editing your slides in real time.
3-4. Embed videos and Google Drive
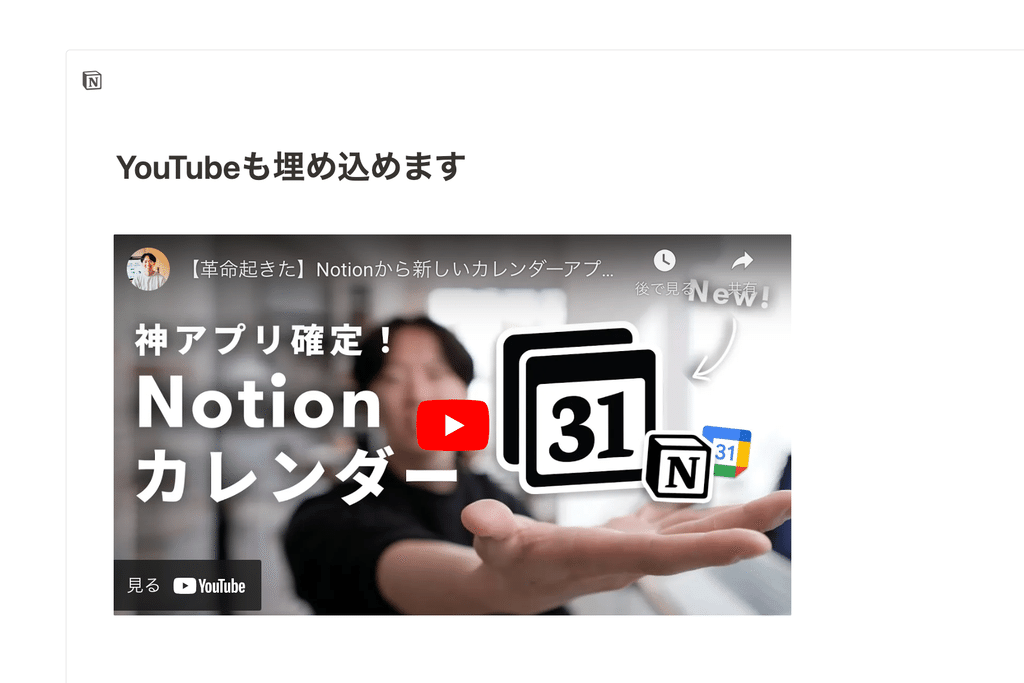
Notion supports embedding various tools, so you can embed videos, social media, Google Drive, and more into your slides.
Summary and template distribution
That's it for how to create presentation slides with Notion!
Creating presentation materials, which can be a daunting task, can be made a little more fun with Notion.
🔗You can copy the template here .
Please try creating slides based on the template!
Click here for a list of Notion templates available on "Notion in Life" !
The book "Notion Life Hacks" is now on sale! It includes 36 templates and provides plenty of practical tips on how to use Notion.
We also introduce how to use Notion and specific examples of its use on YouTube , so please take a look if you're interested.
We will continue to provide information about daily life and Notion to help you get the most out of your busy days.
Thank you for reading to the end!
See you in the next article.

![[Template distribution] How to quickly create presentation materials with Notion.](http://kurashi-notion.com/cdn/shop/articles/notionblog_Presentation_6b11bdcf-d2a0-4666-b64a-84ec6cfea767.jpg?v=1739847563&width=1920)


![[Study Group Report] We held a Notion Formula Study Group!](http://kurashi-notion.com/cdn/shop/articles/2510_notionblog_formulaseminar_967275ed-a27f-4af8-ab02-34ca3ee3f96a.jpg?v=1762425140&width=1920)

